The post T3 Curling Iron Review (and which model to get) appeared first on TeriLyn Adams.
]]>The bottom line is yes, the T3 curling iron is worth investing in. In this post, I’m sharing why it’s better than cheaper ones and which model to get.
For years, I’ve much preferred curling my hair rather than blowing it out straight. With some curl to it, I feel more polished, and my hair is more comfortable during the day, since it stays out of my face more easily.
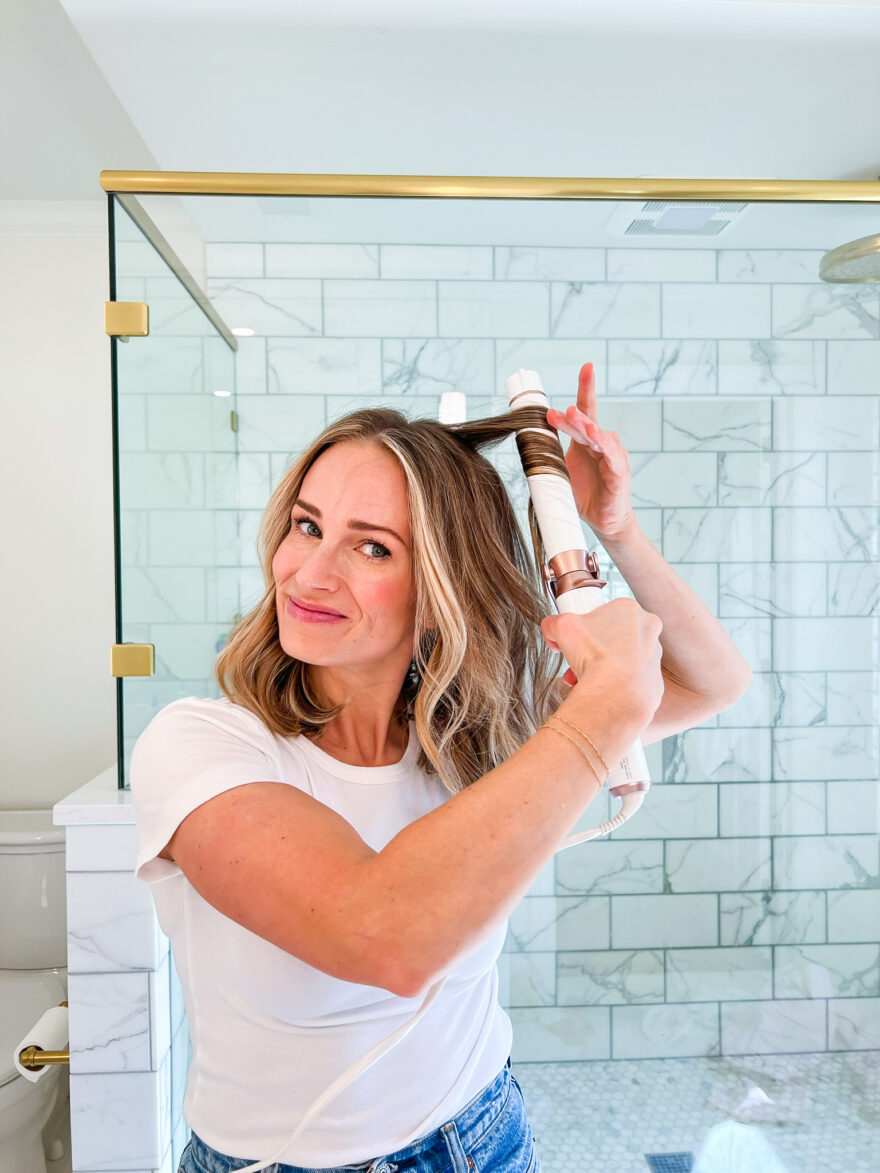
Here’s my tutorial showing how I curl my hair. And while practice makes perfect, I do believe the right curling iron will make it SO much easier, and will make your hair look so much better.
T3 Curling Iron Review (and which model to get)
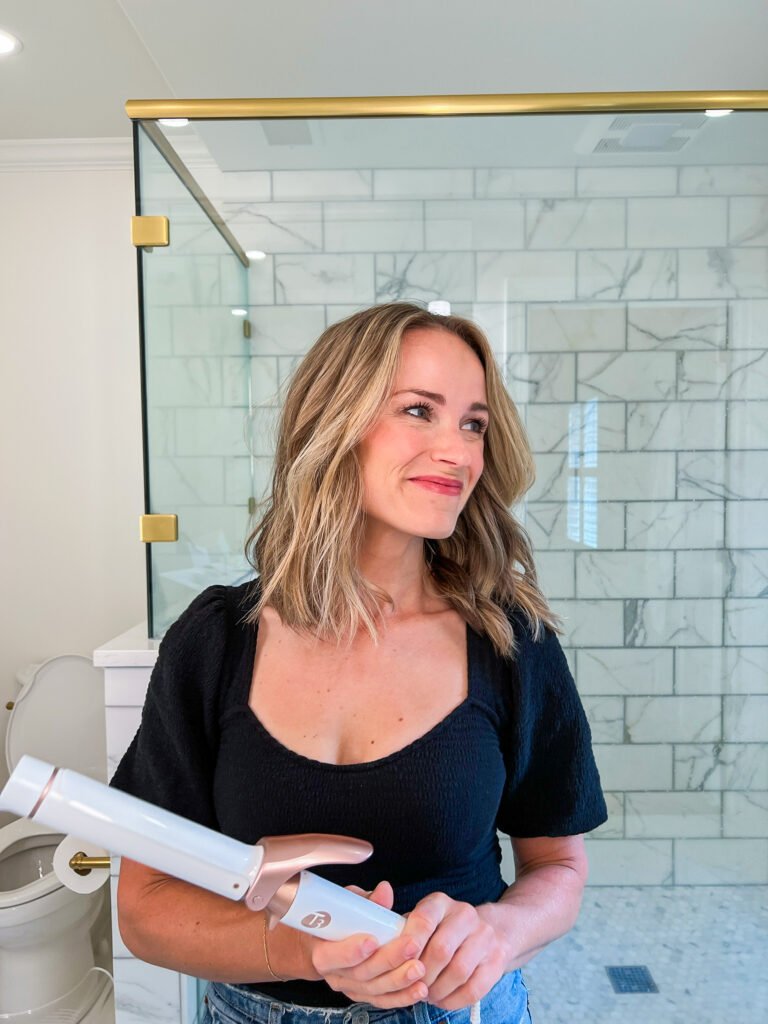
Before T3, I used the Hot Tools curling iron and thought it was fine. But when the spring broke, I invested in the T3 Singlepass Curl X curling iron since T3 hair curlers had great reviews. And I LOVE it. Here’s why:
My curls hold their curl longer.
The iron feels sturdier, and the clamp is easier to use (it never creases my hair)
My hair is in better shape with this curling iron, since it heats more evenly (more on that below).
It holds up much better. I had to replace my Hot Tools every 12-18 months because the clamp would break. I’ve used my T3 multiple times a week for four years, and it’s still in perfect condition.
I’ll share more details about it below, including pros and cons, but the short story is that it’s worth investing in.
T3 Single Pass Curling Iron
The T3 Single pass Curl X is what I own and recommend. This curling iron is a traditional clip barrel curling iron, and the barrel does not detach from the base. It’s the most affordable curling iron T3 offers at $149.99 and it’s been a GREAT curling iron for four years and counting.
The Singlepass curling iron has a few barrel sizes, but I like the 1.25″ because it’s the most versatile size for all hair lengths. I prefer casual curls, and this size gives me the perfect defined curl that falls out perfectly over the rest of the day.
While they sell other curling irons, the Singlepass is the simplest to use and most people really don’t need many more bells and whistles. The best place to order your T3 curling iron is directly from T3 because they will handle issues if yours is not working properly, but they sometimes go out of stock. Amazon also sells T3!
Details
- 5 heat settings and a smart microchip to keep temperature fluctuations in check (which prevents damaging hair)
- Custom blend ceramic plates give a shiny finish.
- Works for most hair lengths.
- The longer barrel makes it faster and easier to curl longer hair, but it still works for shorter hair.
- Multiple heat settings: provides the optimum heat level for any hair type. I love this! I use the hottest setting on my hair since I have pretty thick hair. Cool tip & stand: enables easy styling without burning your hands or getting your counter too hot.
- 360° 8 ft. swivel cord: prevents cord from getting tangled or twisted.
- 1 Hour Auto Shut Off: a must-have so you don’t ever have to second-guess if you turned off your curling iron.
Pros
- Curls last all day – I always use styling cream, and I’m sure that partially helps, but I do think the fact that the T3 gets hotter than cheaper curling irons helps the curls hold.
- No temperature fluctuations prevent it from getting too hot and damaging your hair. This makes it an especially great curling iron for fine hair, which can be more prone to damage, but it also works well for thick hair. (I have fine hair, but I have a lot of it.)
- The clamp is sturdy and has a tighter spring than most curling irons. This not only prevents it from breaking but it also makes it easier to curl your hair, especially when you’re learning since it gives you more control.
- It’s cute. I like the all-white design and sleek components. It doesn’t impact the performance but I appreciate it.
Cons
- The price point may turn some people off, especially if you’ve spent $20 on curling irons in the past, but I easily spent $100 on curling irons that I had to replace every 1-2 years. But I do think the quality of this curling iron justifies the price. I’m listing it as a con simply because I think more people would be on board if it it was closer to $100.
Price
$149.99
If you change your hair length a lot, like to style your hair in many different ways, or you’re a professional stylist, you may want the T3 that has interchangeable barrels, but I think that’s overkill for the average person.
T3 also makes popular curling wands that don’t have a clamp, but so many people burn themselves on them or have to put on gloves, which seems annoying. Plus, I find a curling iron with a clamp gives me more variety in the types of curls I can make. If you are set on getting a T3 curling wand, they do have good reviews!
How to use a T3 Curling Iron
How to use a T3 Curling Iron
I have a hair-curling video tutorial below, and I also have a blog post with pictures of the finished look, plus the products I use to help my curls last.

What makes T3 different? Is it worth it?
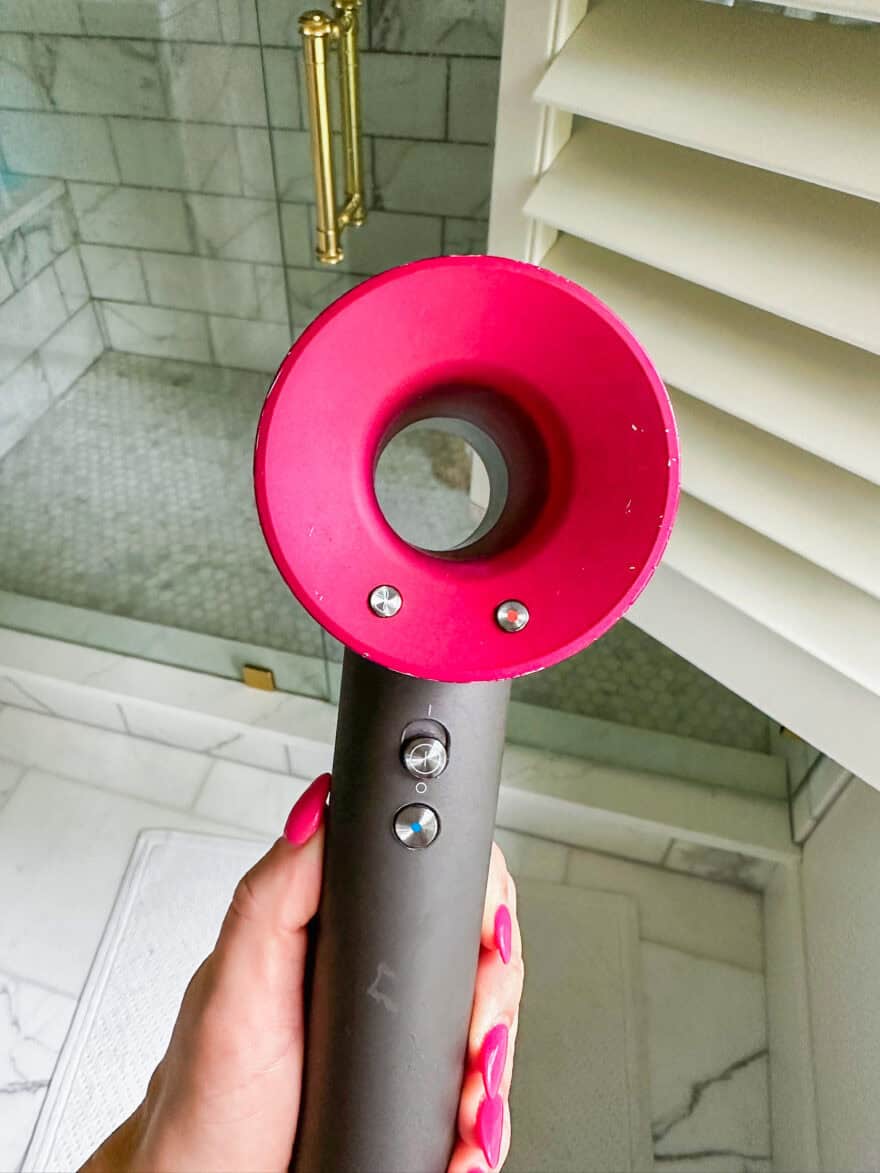
In 2003, T3 was started as part tech start-up, part beauty venture. They wanted to reinvent hair styling by creating new styling tools that were technology-forward, fast-working, and designed with high performance and better results in mind. I truly think they nailed this. They offer different kinds of hair tools, including hair dryers, flat irons, curling irons, and other hair styling accessories.
I own the travel-sized hair dryer and LOVE it (I’ll never use a hotel hair dryer again), and I recently got the Airebrush and it’s been life-changing as well (here’s a video of how I use it). And the T3 hair dryer is better than the viral Dyson hairdryer (I own both). I have a full review of the T3 blow dryer here.
T3 makes a lot of curling irons, including 4 sets, as well as an option to create your own set with a convertible curling iron and attachments. They’re all a little different, so you’ll want to do a little research based on what you’re looking for.
Bottom line: Is the T3 curling iron worth it?
Yes, it’s more expensive than most curling irons on the market, but my hair is in better shape, and I’ve spent less money, since I don’t have to replace my curling iron as frequently. The best place to order your T3 curling iron is directly from T3, just in case you have any issues – they will take great care of you. Amazon also sells T3.
Shop The Post
The post T3 Curling Iron Review (and which model to get) appeared first on TeriLyn Adams.
]]>The post T3 Hair Dryer Review & How It Compares to Dyson appeared first on TeriLyn Adams.
]]>Get 20% off your T3 order with code TERILYN20
One of the most frequently asked questions I get on Instagram is about my hair. It’s such a great compliment, and while I do think the majority of the credit goes to genetics (and a great hairdresser), I have spent countless hours learning how to style it well and figuring out which products work best on my hair type. And my most-used hair tool is my T3 Hair Dryer and it’s time for a review since I have strong feelings about, considering I also own the Dyson blow dryer (andI also have a review of the Dyson Airwrap).
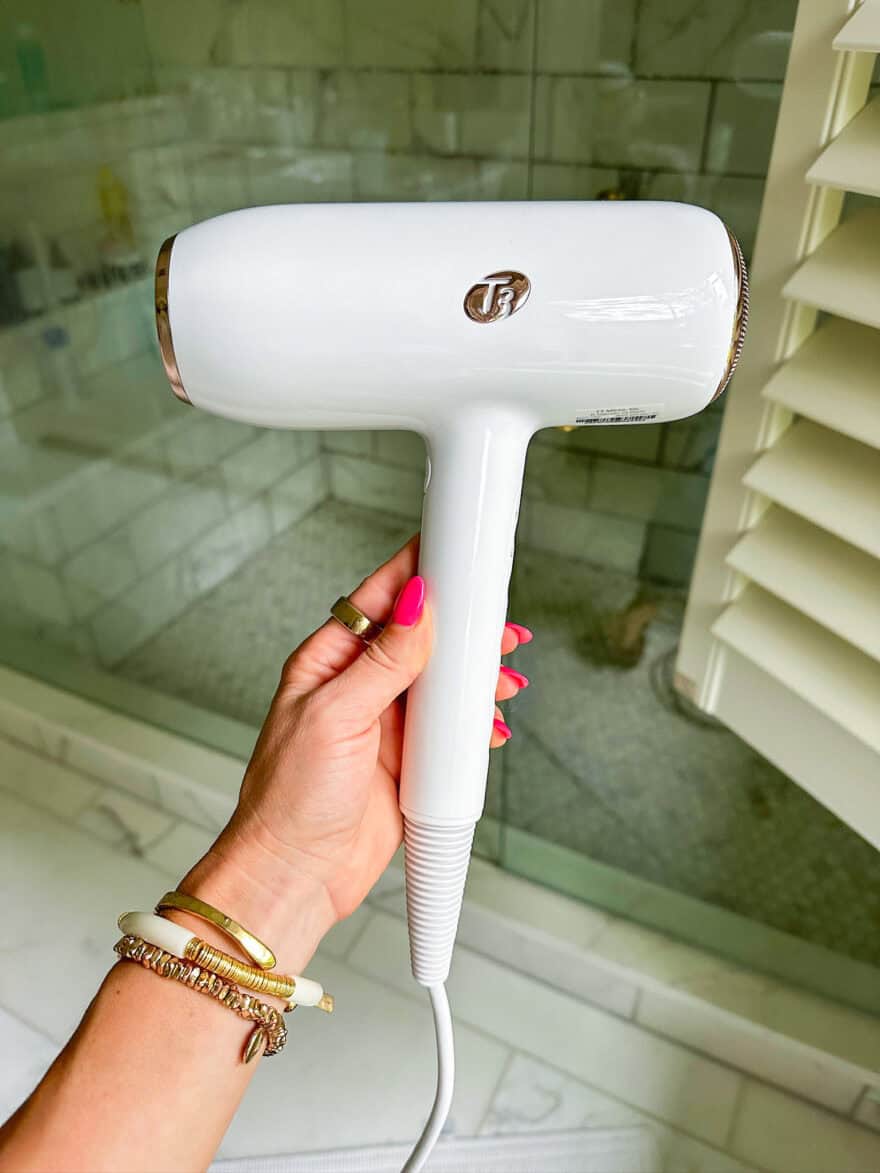
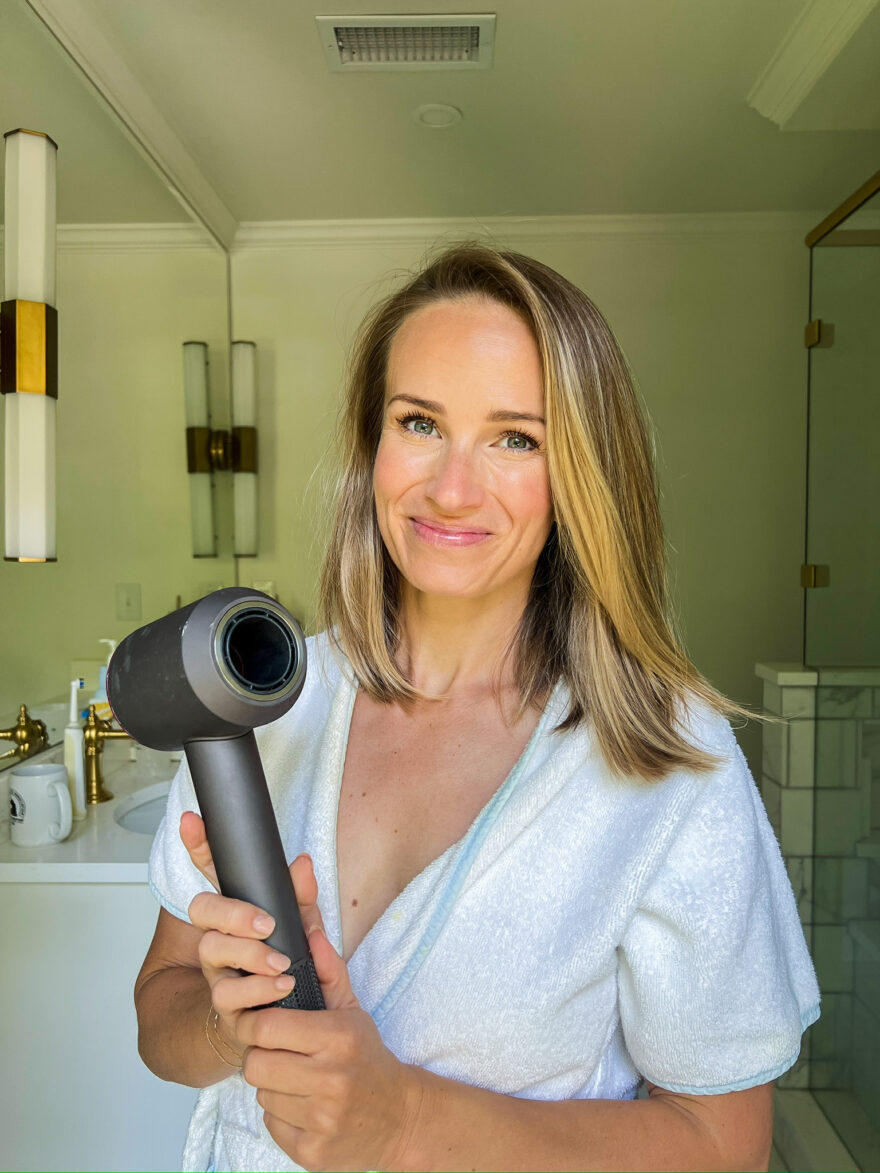
Just like skincare and makeup, I love trying new hair products. Since I work in the beauty industry as a content creator, brands often send generous PR packages with product to try, and I also spent a good bit of my own money on beauty products since it’s something I’m passionate about. Overall, I’ve tried a ton of hair products, styling tools included, and I think I can officially name my all time favorite hair dryer: The T3 Featherweight Style Max.
Here’s why:
- It has automatic heat and speed adjustments (you just program your hair texture and it does the rest)
- The technology is designed to smooth and dry quickly without damage
- It’s lightweight and easy to use
- The Volume Boost button helps give my hair that extra lift I love
- It’s cheaper than my Dyson
- It dries my hair in 5 minutes flat – and my hair stylists over the years have always commented how much hair I have
In today’s post, I’m sharing all the details on this hair dryer, including how it holds up to my previous favorite, the Dyson Supersonic Hair Dryer.
Get 20% off your T3 order with code TERILYN20.
T3 Hair Dryer Review & How It Compares to Dyson
What is T3?
T3 is a hair tool company that started in 2003 as a part tech start-up, part beauty venture. Their goal was to create hair tools that were technology forward and designed with high performance and great results in mind. They make a ton of hair tools including 4 different hair dryer models, flat irons, curling irons, and other hair styling accessories. and I love every single product I’ve tried.
Here are the T3 products I own:
- Travel sized hair dryer
- Curling irons in almost every size
- AireBrush AND the AireBrush Duo
- Hot Rollers
and of course, the Featherweight Style Max which I’m reviewing today.
T3 Featherweight Style Max Features
Let’s get into details about the T3 Featherweight Style Max.
The T3 Featherweight Style Max is T3’s most impressive and robust hair dryer model. They make 4 different hair dryers, and I’ve found that the Featherweight Style Max is the best bang for your buck because of the automated technology. The most similar option from T3 is the AireLuxe, which is also a great hair dryer, but it’s all manual in terms of the settings (and for the same price, I think the Featherweight is far more impressive).
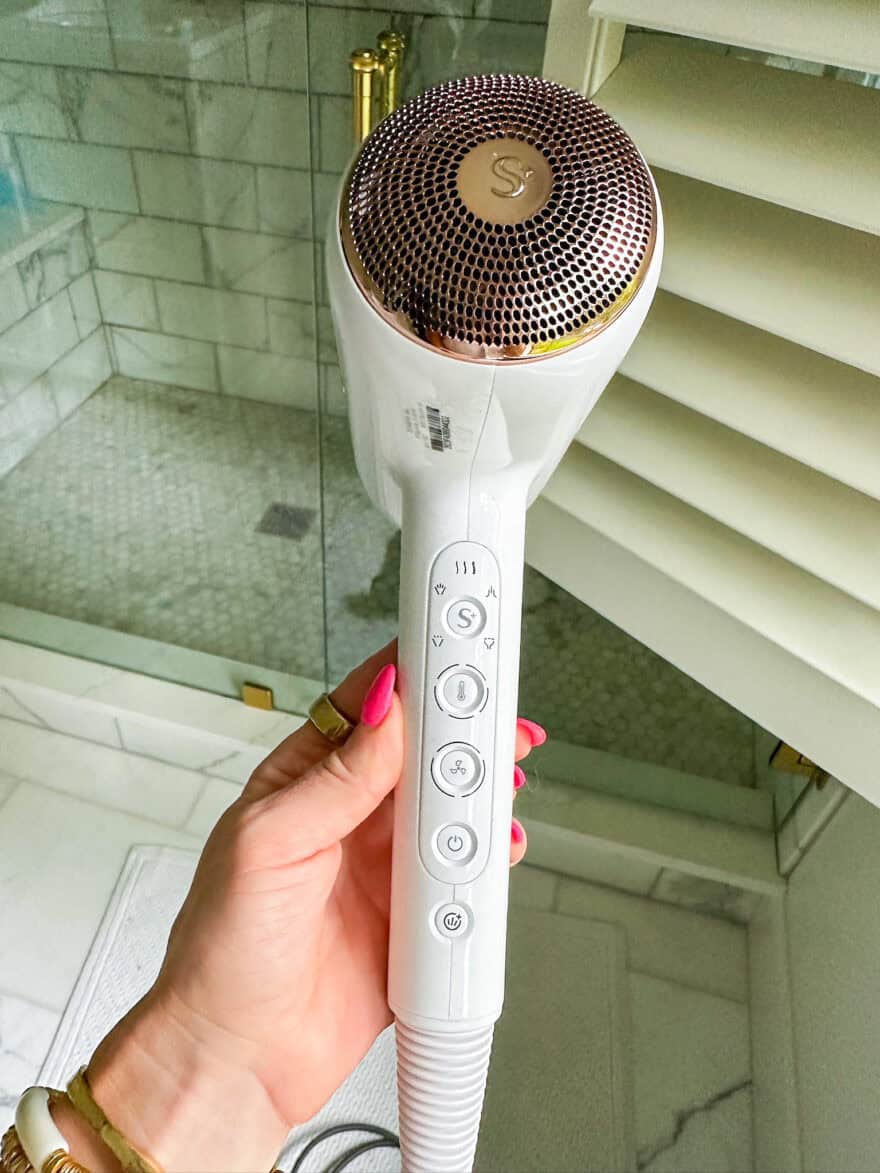
The Featherweight Style Max auto-customizes heat and airflow to your personal hair texture, and dries quickly, evenly, and with less damage. There are 5 heat settings and 3 speed settings that the hairdryer automatically adjusts for, which is a really cool feature. All you have to do is input your hair texture, and it does the rest.
The T3 hair dryer also uses Digital T3 IonAir Technology. The IonAir Technology powers a smart microchip that helps minimize temperature fluctuations and prevents over-drying. It’s made with a fan that propels two times wider than other hair dryers and the 1 ion-rich airstream dries the hair super quickly while still retaining the hair’s natural moisture, so you you’re left with shiny, healthy hair that’s not damaged or tired. The ion generator also tames static frizz. That’s a lot of techy talk, but the short of it is that they’ve created a gentle but effective hair dryer that makes your hair look amazing.
Here are the main features:
- StyleMax Technology: a smart microchip that auto-customizes the heat and speed settings to your hair texture
- Wider Airflow: T3 uses a Digital T3 IonAir Technology which gives the hairdryer a wide, ion-infused airstream which gently (but quickly) dries hair and gives body and shine
- Ion Generator: Minimizes static frizz by smoothing the hair cuticle and boosts shine
- Multiple Heat Settings: 5 different settings for all hair types and textures
- Multiple Speed Settings: 3 different settings for drying and styling
- Volume Boost Switch: Helps boost texture and volume
- Cool Shot: blasts cool hair to helps lock in your hair style
- Lightweight: It’s really easy to handle and comfortable in your hand
T3 Hairdryer vs Dyson Hair Dryer
Size and Weight
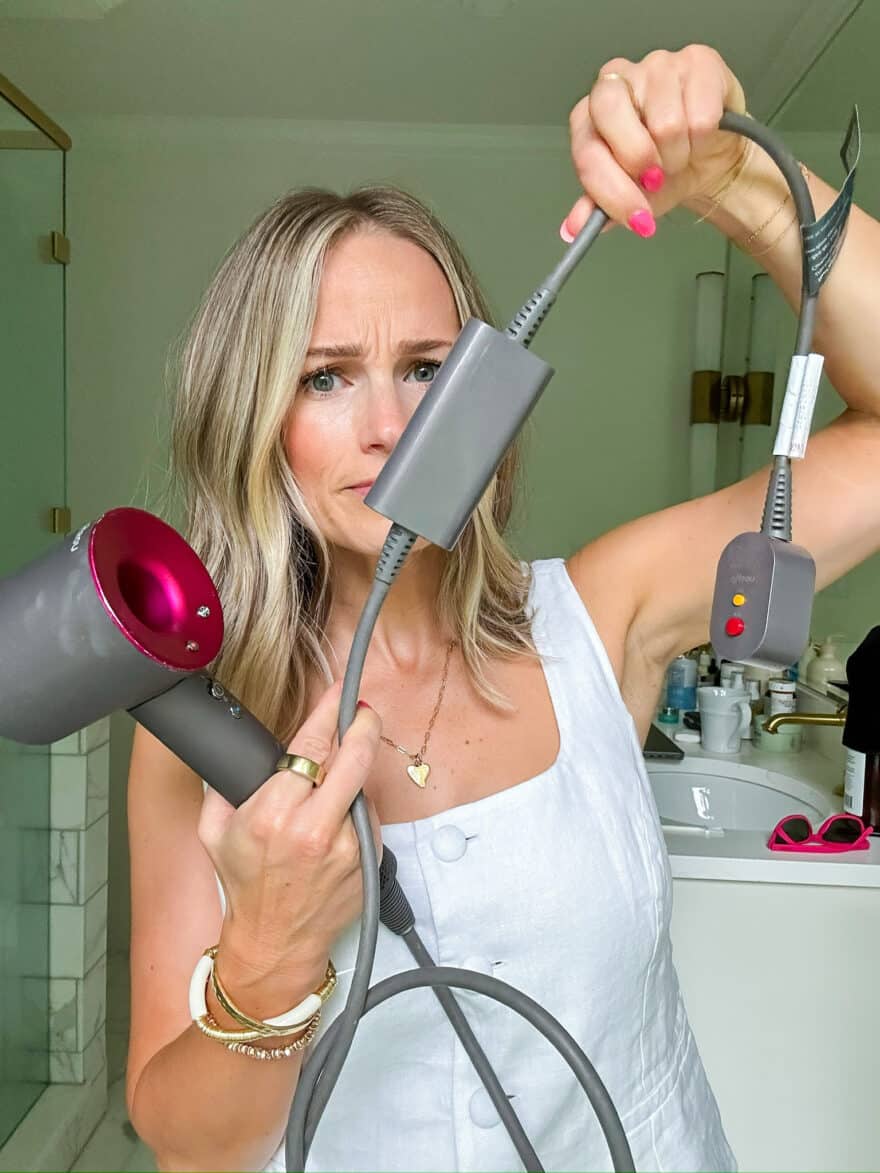
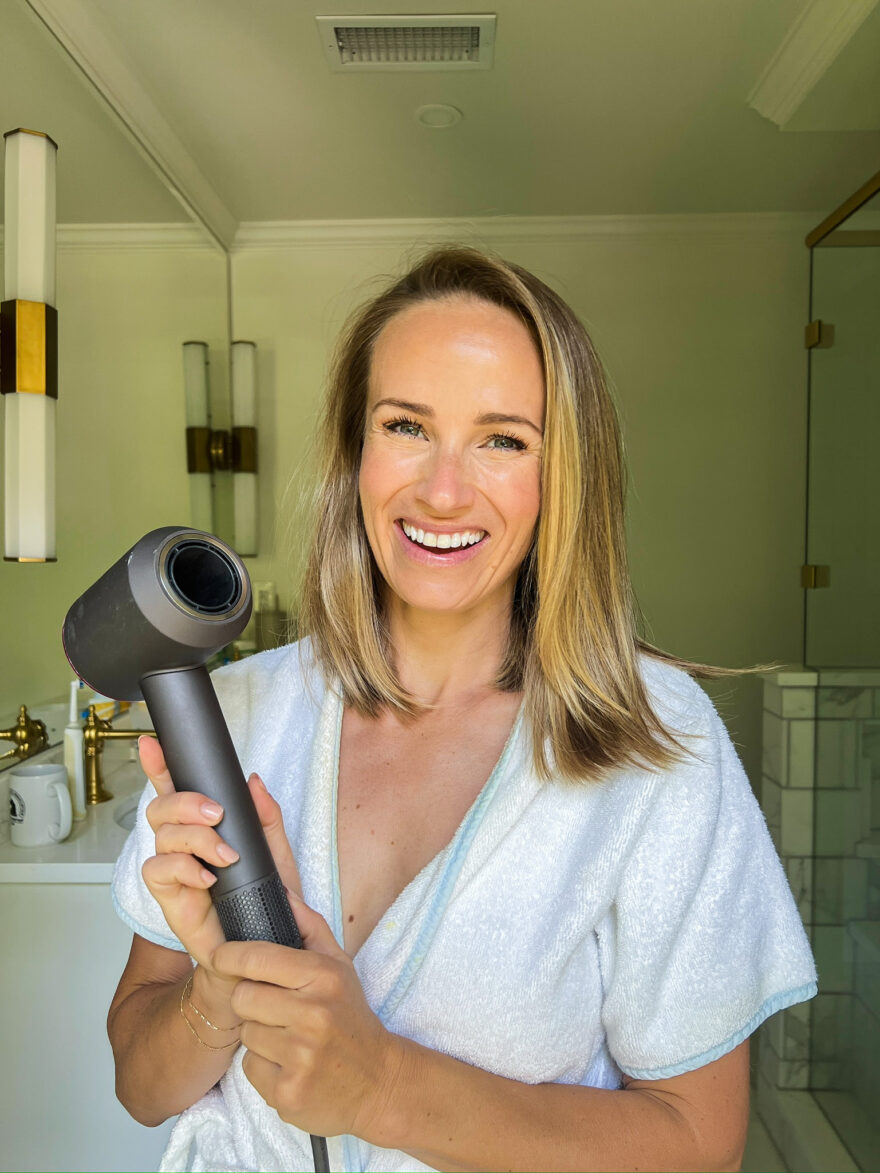
A huge selling point of the T3 Featherweight Style Max is the size and weight (the name gives this away). It weighs 16.6oz (cord not included), and the cord length is 9 ft, so you’re never struggling to dry your hair, even when your outlets are inconveniently located.
The Dyson Supersonic Hair Dryer weighs 1.8 lb (almost double) and has the most annoying block on the cord that bangs into my cabinets every time I use it.
Volume Button
One of my favorite features of the Featherweight Style Max is the Volume boost button. This button turns off the negative ion generator to give your hair extra body.
My Dyson does not have this.
Attachments
This hair dryer comes with 4 different attachments:
- Drying concentrator: wide nozzle attachment to help dry hair quickly
- Styling concentrator: narrower nozzle attachment to concentrate airflow for precise styling
- T3 SoftTouch 3 Diffuser: softly diffuses the air which helps volumize and define curls, waves, and layers
- T3 Smoothing Comb: This attachment directs the air through vented teeth to lift roots, smooth strands, and stretch and detangle curls and coils
The Dyson hair dryer comes with 5 attachments:
- Flyaway attachment: Helps lift longer hairs to the surface to hide flyaways
- Styling concentrator: A narrow nozzle to help with styling
- Diffuser: helps reduce frizz and define curls
- Gentle air attachment: A wider nozzle that diffuses the air. This is the best for a rough dry
- Wide tooth comb: Creates volume and shape in curly or coily hair
Price
Another huge selling point of T3 is that it’s about 1/2 the price of the Dyson.
The Featherweight Style Max costs $199 (and you can use the code TERILYN20 for 20% off), and the Dyson is Over $400.
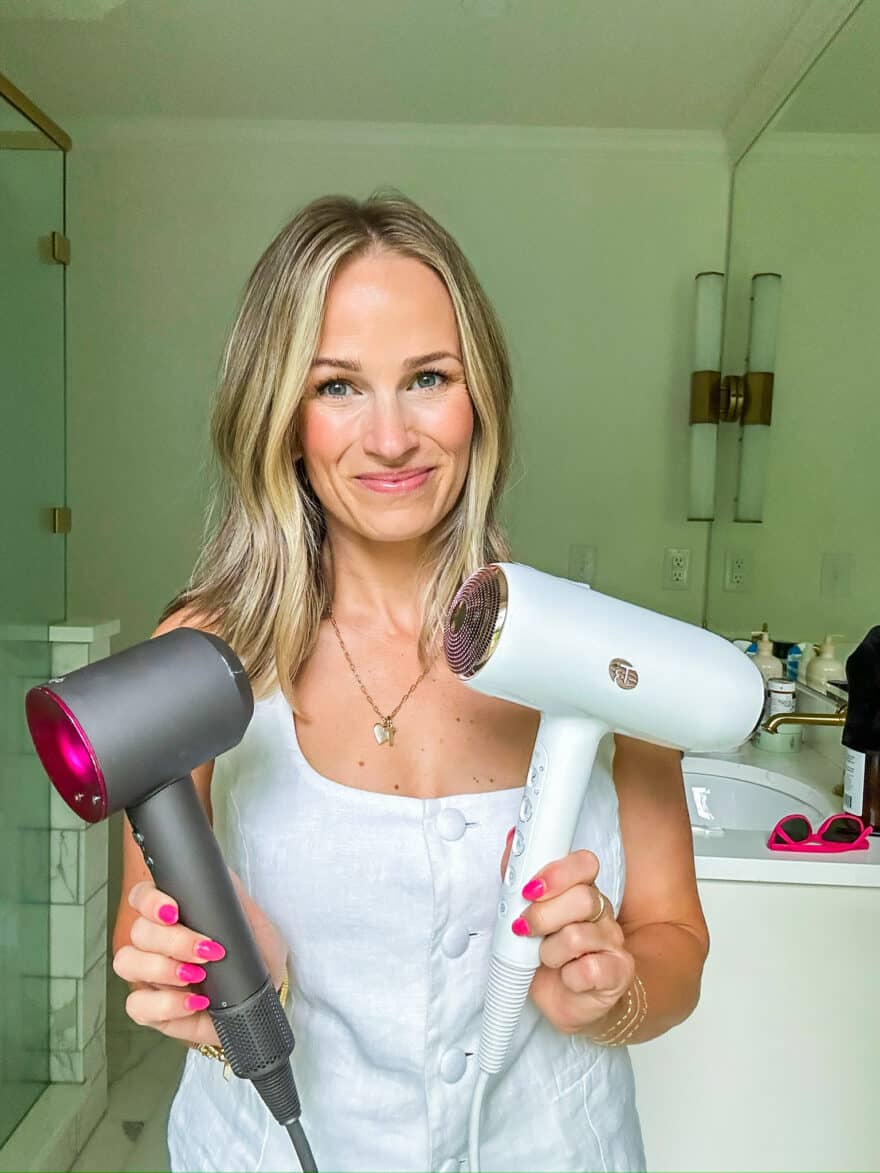
How the T3 compares to Dyson
I got the Dyson Supersonic hair dryer a few years ago when my super old hair dryer finally bit the dust. I loved it for years and hesitated to try the T3 because I was certain that the Dyson price tag meant that it was the best on the market, but I was shocked to realize I liked the T3 a lot better. It’s so much lighter, dries my hair just as fast and with much more control, and it’s so much more affordable, which you can’t beat.
I shared a few more details about what makes the T3 dryer better than the Dyson in this reel.
Styling Tips
Before I blow dry, I like to wash my hair and do my full hair care routine.
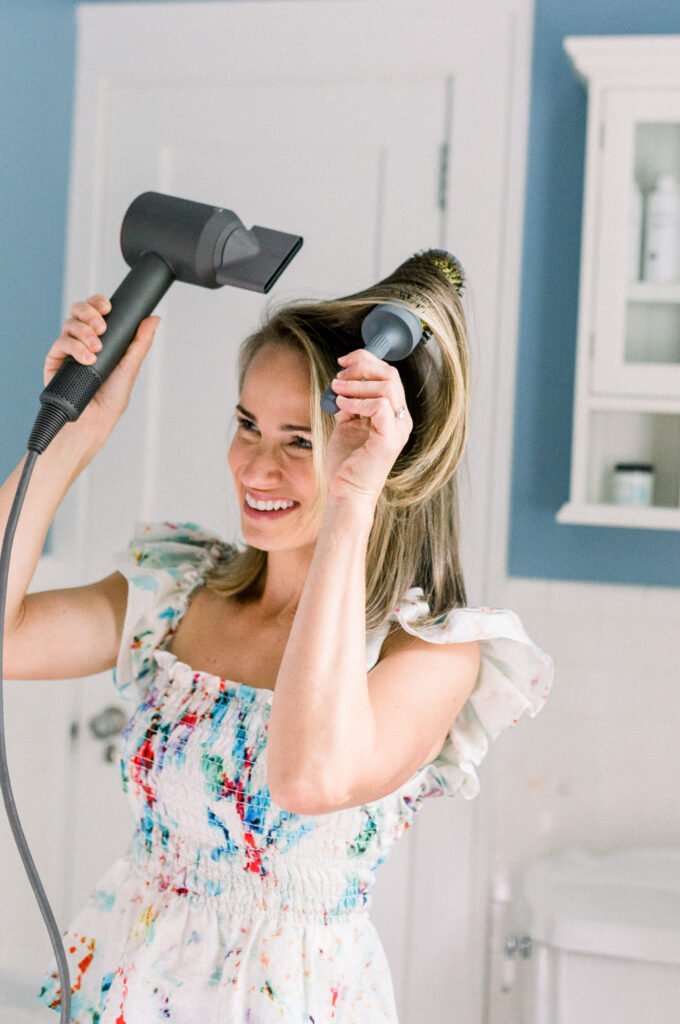
I have really thick hair, so I always do a rough dry before I start styling my hair. Once my hair is about 80% dry, I section it into layers and use this round brush to smooth each layer as it dries.
Then depending on my mood, I’ll either leave it straight or use my favorite T3 curling iron (I have a hair curling tutorial linked here). Some days I’ll use the AireBrush too, but if I use that, I dry my hair to 80% and then switch to the AireBrush for the last 20%. Here’s a video on how I use the AireBrush.
Get 20% off your T3 order with code TERILYN20.
Shop The Post
The post T3 Hair Dryer Review & How It Compares to Dyson appeared first on TeriLyn Adams.
]]>The post The Best Replacements for your Beautycounter Products appeared first on TeriLyn Adams.
]]>I’ve been using Beautycounter alongside a handful of other brands for a few years now, but as a skincare and makeup junkie, I was always trying new brands so I have some great recommendations for the best replacements for your Beautycounter products.
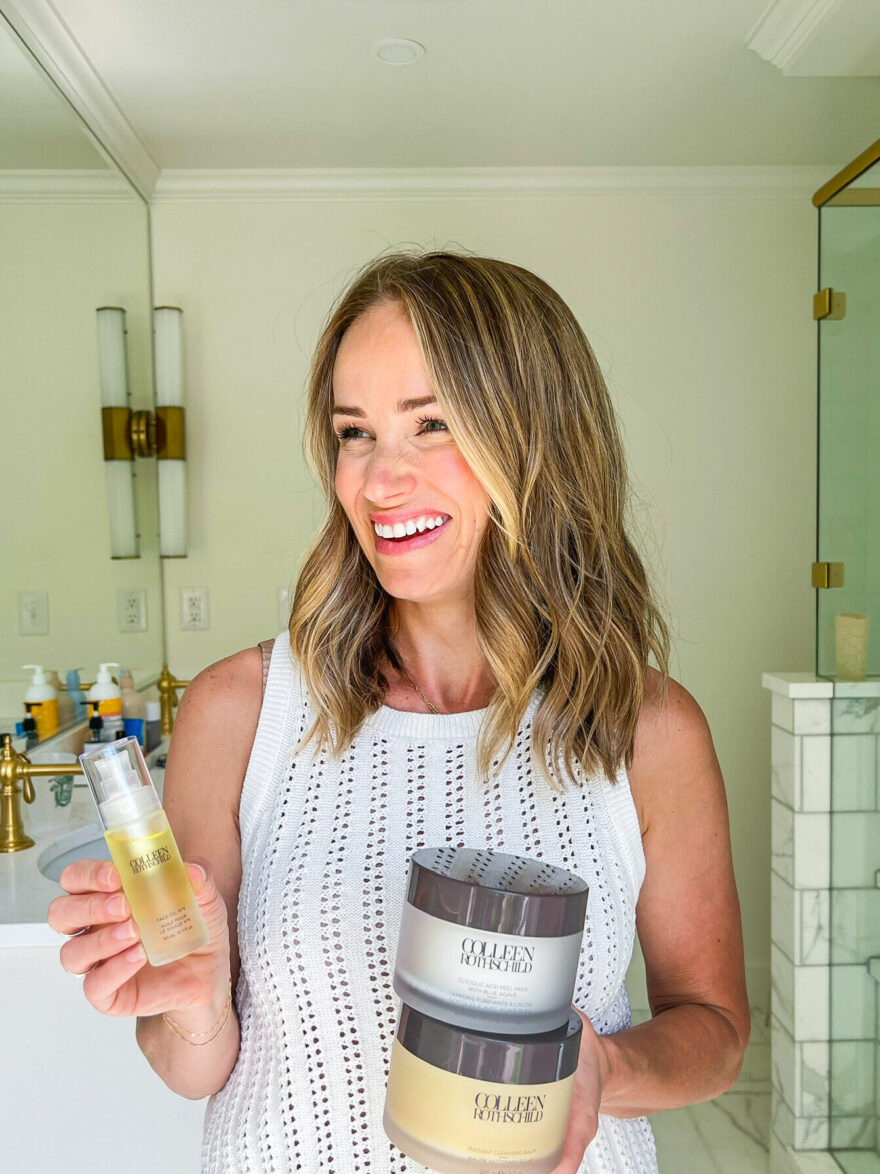
Fingers crossed we’ll get our Beautycounter favorites back later this year after Beautycounter gets sorted out, but until then, the show must go on for our skin, ha! (Here’s a post about what happened to Beautycounter.) The best brand I’ve found for Beautycounter swaps is Oliveda. I’ve been using their products in place of all of my Beautycounter stuff for over a month now, and I can confidently say they are great alternatives (and even better in some cases) for your favorite Beautycounter products. Oliveda is a European brand that focuses on waterless skincare, so it’s extremely potent and the results are SO wild. I noticed a change in my skin within 72 hours!
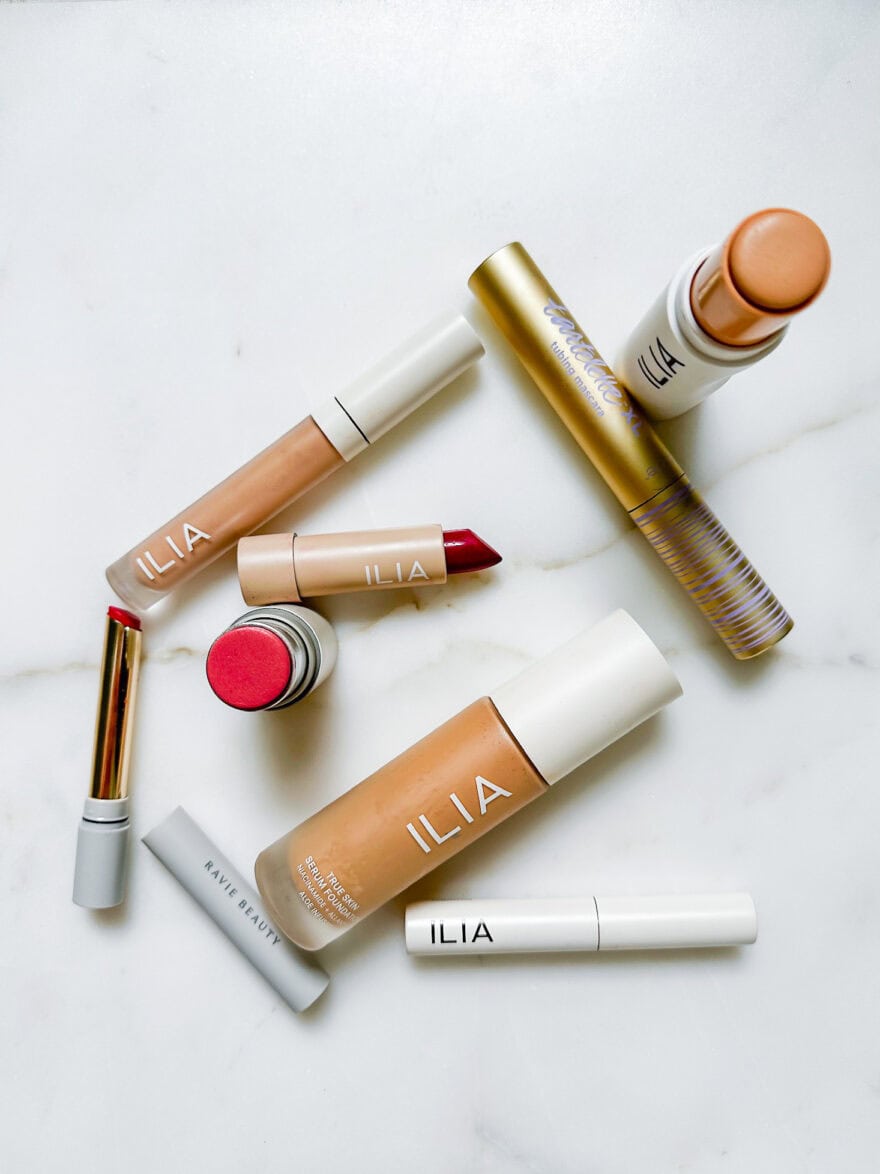
I know that it’s a LOT simpler to order from one place vs. multiple retailers, so the majority of the links below are to Oliveda with a few Colleen Rothschild additions. And for the makeup section, almost everything is ILIA since that is currently making up the majority of my makeup routine. If you aren’t familiar with those brands, I have a review of Oliveda here, a Colleen Rothschild review here, and a review of ILIA here.
Oliveda’s website can be a bit confusing, and since the products aren’t organized the same way that Beautycounter organized theirs, it can be hard to know what to order for your skin type! The list below should help, but feel free to fill out this skincare survey and I will email you back with personalized recommendations! You may also notice that a lot of Oliveda products are sold out (things have been going somewhat viral!) but I’m sharing in-stock alerts in this Instagram Broadcast Channel, so be sure to join that for alerts.
I also send out text updates about Oliveda restocks. If you want to join my list, click this link and the hit send when it populates the word “oliveda” in your text composer. I know not everyone checks email or FB and/or IG all day (ahem) so hopefully this helps those of you who haven’t been able to get things when they restock before they sell out again! These are text messages that I send (not the company!) and I won’t blow up your texts unless it’s time sensitive or I think it’s important!
If you’re reading this post on a computer, that link won’t work. Just text OLIVEDA to 336-554-7262 to join.

The Best Replacements for your Beautycounter Products
Countertime
Countertime Cleansing Oil
The Oliveda Arbequina Cleansing Oil (F78) is the best swap for the Beautycounter cleansing oil. It smoothes, refines, and provides lipid defense, but it also removes impurities without destroying your skin’s natural barrier function.
Countertime Essense
The Corrective Facial Tonic (F67) is Oliveda’s toner for dry, aging skin. It works to soothe your skin while also getting rid of dead skin cells. It has hydroxytyrosol and the vitamin C booster camu camu which protect your skin from environmental stressors AND gives your skin a radiant/youthful glow. Nothing will ever be my beloved Countertime Essense, but this is a great alternative.
Countertime Radiance Serum
I wasn’t a huge fan of the Beautycounter Radiance Serum anyway. I tried the Oliveda F59 Corrective Face Serum a few weeks ago and my mind is blown. This is what people call “botox in a bottle”. It’s made with para cress which has a lifting effect similar to botox, but’s clean and safe. It targets fine lines, wrinkles, and hyperpigmentation. I’ve noticed a significant difference in my smile lines since I started using this.
I also just got the Oliveda Green Retinol Face Elixir and I’ve been adding a few drops to my Corrective Face Serum at night. This is a natural retinol made with bakuchiol, which is the same retinol alternative that Beautycounter used. This reduces fine lines and pore size, improves complexion, contracts pigmentation, AND protects against free radicals. If you’re only getting one serum, get the Oliveda F59 Corrective Face Serum, but add the Green Retinol to your wishlist since you can add it to your routine at any time.
Countertime Soft Cream
The best Soft Cream swap is the Oliveda F42 Corrective Face Cream. It’s ideal for dry/aging skin because it has extra hydroxytyrosol in it (a super powerful antioxidant). It’s smoothing, super hydrating, improves elasticity and reduces fine lines. It contains a sun protection factor!
Countertime Supreme Cream
I was worried it would be hard to find anything as great as the Beautycounter Supreme Cream, but the Oliveda F74 Regeneration Intense Face Cream has blown me away. It’s actually more hydrating than the supreme cream. The texture is weird and it takes some getting used to how it’s applied and massaged in, but now I love it.
Countertime Eye Cream
The best swap for the Countertime Eye Cream is the Oliveda F60 Corrective Eye Cream. It’s hydrating, boosts collagen, and gives you a smoothing effect around your eyes. But the real game-changer is when you add a few drops of the Oliveda F64 Corrective Eye Elixir underneath the eye cream. It It has a triple hyaluronic acid structure and a ton of antioxidants, so it hydrates and plumps while also giving your eyes a more lifted, radiant look. You apply a few drops under your eyes, massage it in, and then follow with the Corrective Eye Cream.
Countermatch
Countermatch Foaming Cleanser
For the Countermatch Foaming Cleanser swap, you’ll want to use the Oliveda F71 Corrective Cleansing Gel. It’s made with hydroxytyrosol (this is the superstar of antioxidants, mainly found in olives and olive oil) and gives you a deep clean while counteracting pigmentation. It’s super gentle and very hydrating (I can even use this on my very dry skin). It smells amazing, but the smell is very natural and not super strong. (I’m sensitive to scents and love this.) I can use this morning and night and my very-dry skin isn’t stripped at all.
Countermatch Toner
The Oliveda Activating Facial Toner is the perfect toner for normal or combination skin because it’s non-drying and does not strip your skin, but rather helps restore your skin’s natural balance.
Countermatch Serum
The best recommendation for an alternative for the Countermatch serum is the Oliveda F86 Corrective Vegan Hyaluronic Acid Serum. Hyaluronic serums are great for dry and aging skin because they deeply moisturize and hydrate. This serum also repairs oxidative damage and makes your skin look and feel more elastic/tight. This can be used in the morning and night.
For something a bit more affordable (and almost as good), I’d recommend the Colleen Rothschild Hyaluronic Serum.
Countermatch Adaptive Moisturizer
The most similar in terms of benefits is the Oliveda F05 Anti Oxidant Face Cream but it will feel different. The consistency feels much thicker, but it’s not heavy on the skin. It protects, balances, and hydrates your skin, but it has antioxidants in it too that fight the effects of environmental stressors on your skin. This is lightweight (in terms of hydration, not feel!) and plumping.
Countermatch Eye Cream
The best eye cream option for de-puffing and brightening is the Colleen Rothschild Illuminating Tinted Eye Cream. It contains hyaluronic acid to help reduce the appearance of wrinkles and caffeine targets puffiness and water retention. I wouldn’t use this at night though, since it also has coverage that you wouldn’t want to waste. For PM, use the Oliveda F09 Anti-wrinkle Eye Cream. I love the texture and it’s completely non-irritating. It tightens and reduces fine lines around your eye area. You can use it in the AM too, but I just love that Colleen Rothschild Tinted Eye Cream.
Countercontrol
Countercontrol Cleanser
A great cleanser for oily or breakout prone skin is the Oliveda F38 Purifying Cleansing Gel. This gives you a super deep cleanse while also supplying your skin with highly concentrated antioxidants that help prevent signs of aging.
Countercontrol Toner
The Oliveda F11 Activating Facial Toner is perfect for oily/acne prone skin. It helps clear away impurities while also soothing your skin with chamomile extract. It also refines pores and gives your skin tone a more radiant glow.
Countercontrol Serum
The Oliveda F81 AHA + HT Serum Face is a true hero product. It’s similar to the Overnight Resurfacing Peel in terms of benefits: reduces scarring, improves elasticity, reduces and fights hyperpigmentation, and boosts collagen. It’s great for breakout prone skin because it gentle exfoliates and sloughs off dead skin which can cause build up and breakouts. This is pretty potent though, so I’d only use it once a week to start!
For a daily serum, you’ll want to try the Oliveda F06 Cell Active Serum . This serum helps smooth your skin and reduce pore size, but it mainly reduces dark spots and smoothes wrinkles! What I love most about this is that it has a skin-tightening effect! It’s just a great all-around serum for most skin types.
Countercontrol Spot Treatment
For a spot treatment, you’ll want to use the Oliveda F85 SOS Face Drops. These drops unclog pores, balance sebum production, and reduces acne-causing bacteria.
CounterControl Gel Cream
The Oliveda F07 Anti Aging Face Cream is a great face moisturizer for oily/acne prone skin. It’s lightweight, improves skin elasticity, and overall just balances the skin’s hydration. It’s important to use a moisturizer, especially when you have oily skin since drying out your skin causes it to produce more oil to overcompensate.
Other Favorites

Cleansing Balm
I preferred the Colleen Rothschild Cleansing Balm anyway. I’ve been using it for years. I have a full review of the CR Cleansing Balm here.
Vitamin C Serum
We all loved the Beautycounter Vitamin C serum for good reason, but I think you’ll love the Oliveda F83 HT + Vitamin C Serum more. It’s made with hydroxytyrosol which is a super powerful antioxidant, and it also contains camu camu, just like Beautycounter. This has 1300% more power than vitamin C alone. It improves fine lines and wrinkles, neutralizes free radicals, and gives you a super radiant complexion.
Overnight Resurfacing Peel
The Oliveda F81 AHA + HT Serum Face is just like the Overnight Resurfacing Peel. It’s a chemical exfoliator that visibly reduces the signs of aging. It also reduces scarring, improves elasticity and firmness, reduces and fights hyperpigmentation, and boosts collagen. Everyone should have this in their skincare routine.
Sunscreen
Supergoop Glowscreen is my favorite face SPF, but it’s not a zinc-based sunscreen. If you want zinc, then the Acure Radically Rejuvenating SPF 30 Day Cream is perfect since it’s a clean option! (This post with non-toxics sunscreens has even more ideas.)
AHA Mask
I actually didn’t love the Beautycounter AHA mask as much as I already liked both the Colleen Rothschild Dial Enzyme Polish and Oliveda Honey Enzyme Face Mask. They’re similar, but the Oliveda Honey Enzyme Face Mask has a warming sensation that I love. It’s also green which is fun! It’s especially beneficial for dry and/or aging skin since you’re paying more for those types of products and you want to get the most out of them. (The women who give me my facials have been telling me for years that I need to use an enzyme mask regularly to see improvements in my fine lines and deeper wrinkles).
Bamboo Face Polish
I haven’t found anything like this, but the Oliveda Olive Core Face Peeling is also a physical exfoliator and it’s a great option even though I love the powder form of the Bamboo Polish.
#3 Balancing Oil
If you were a Balancing Oil fan, then the F25 Neroli Face Oil Serum from Oliveda is a great replacement.
The Clean Deo
All natural deodorants tend to stop working for me after about 12 months, including the Clean Deo. This is actually an issue that women commonly run into if they use natural deodorants, since our body chemistry changes over time. (It’s also why some clean deodorants work for some people but not others. For example, I CANNOT use Native but some people love it.)
Anyway, when one stops working, I switch to a new one. The one that has worked for the longest amount of time is the Nécessaire The Deodorant Gel. I’ve used it for 6 months without stank.
(If you do get stank with a natural deo, use the Bella Skin Probiotic Underarm Toner and it will help a LOT! I use it just once a month or so.)
Body Lotion
Wink Llama All Over Lotion, hands down. Yes, it’s a kids lotion but it’s so good. Tommy and I have both used it for years since it smells just as good as the Beautycounter Body Lotion (although it is a different scent) and it’s more affordable.
Shampoo / conditioner
I’ve been using the Colleen Rothschild Shampoo and Colleen Rothschild Conditioner for over a year now. The Colleen Rothschild hair mask is legit too. I use it in place of my conditioner a few times a week.
Body wash
Primally Pure Citrus Mint Body Wash is a 10/10. So hydrating and smells amazing.
Makeup
Skin Twin Foundation
The ILIA Skin Rewind Complexion Stick is SUCH a good foundation, but if you want a liquid foundation, the ILIA True Skin Foundation is a good option (I have an ILIA foundation review here).
Dew Skin Tinted Moisturizer
I wasn’t in love with the Dew Skin tinted moisturizer anyway (it too drying as my skin aged), but I DO love the ILIA Super Serum Skin Tint SPF 40 because it’s more hydrating. I have a full review of the Skin Tint on the blog here.
Cheeky Cream Blush
I’m super sad to loose the Beautycounter blush but the ILIA Multi Stick is just as good.
Cream Bronzer
I hate it because Beautycounter was set to launch new bronzers that I had tried and they are SO GOOD. I haven’t found an alternative yet, but the Tarte Shape Tape Contour works well as bronzer if you use just a touch and blend it out. I also love their Tarte Park Avenue Princess powder bronzer if you want to go that route.
Mascara
As much as I wish I could wear a regular, oil-based mascara, they always smudge on me. So I always shop for tubing mascaras that are water soluble. (Read more about tubing mascaras and how they work here.)
However, if you were a Beautycounter mascara fan and it didn’t smudge on you, you’ll really like the Tarte Maneater mascara. If you need a good tubing mascara recommendation, you can’t beat Tarte’s Tartelette Tubing mascara (read my Tartelette Tubing Mascara review here).
Concealer
The ILIA Concealer is a great (super clean) alternative. My preference is the Tarte Shape Tape Radiant concealer though since I only really use it under my eyes.
Lip Sheer
I just got the Ravie Beauty Effortless Lips in the mail a few weeks ago and they are UNREAL! They apply very much like the Lip Sheer (actually, better). See how each Ravie Beauty shade looks on me in this video. Go for Dahlia for the best everyday shade.
Lip Intense
I like the ILIA Colorblock Lipstick. It’s not quite as good as the Beautycounter lipsticks but it’s similar and a clean option. My all-time favorite lipstick is Charlotte Tilbury Pillow Talk.
Brow gel
ILIA Brow Gel is very similar to Beautycounter’s brow gel, but it doesn’t dry out as quickly.
Discount Codes
One silver lining to trying new products is that you can typically get a discount on your first order (and I believe all of my codes work on every order).
- Colleen Rothschild – Use code TERILYN20 for 20% off
- Tarte – Use code terilyn15 for 15% off
- Wink – Use code TERI for 15% off
- Primally Pure – Use code TERI for 10% off
Oliveda doesn’t have a promo code, but they do have good perks.
- A freebie when you take the Oliveda skincare quiz and order 2+ of the recommendations. I have to note that I think their Skin Quiz results can be a little confusing to understand, so if you fill out my skincare survey here, I can help get you personalized recommendations.
- Free shipping on $50+ orders (ALWAYS!)
- 365 day product guarantee.
Okay, that’s all I have for now! Like I mentioned above, if you have good recommendations for Beautycounter swaps, please drop them below!
Shop The Post
The post The Best Replacements for your Beautycounter Products appeared first on TeriLyn Adams.
]]>The post My Hair Care Routine + Favorite Products appeared first on TeriLyn Adams.
]]>Two years ago, I finally wrote a blog post about my hair care routine, and some of my favorite hair products (namely heat tools!) are discounted during T3’s 25% off sale, so I wanted to re-share this post today with my current routine.


My Hair Care Routine + Favorite Products
My hair care routine
While this isn’t part of my hair washing routine, I wanted to note that I’m also taking Nutrofol’s Hair Growth Nutraceutical right now to help with postpartum hair loss. I just recently started taking it, and I’m planning to be super consistent since I hear that’s how you see the best results. I’ll add updates to this post once I’ve taken it for a bit longer.
1. WASH
My current favorite shampoo and conditioner is the Colleen Rothschild shampoo and conditioner. It’s hydrating, smells great, and you get more ounces for almost the same price as Beautycounter, which was the shampoo and conditioner I was using prior.
While Beautycounter is the “cleanest” of the two brands, I’m an 80/20 type of person and I prefer Colleen Rothschild in this case. (This post talks about what ingredients to avoid in your shampoo!)
2. SCALP SERUM
I use Divi Scalp Serum on my hair once it’s towel dried. (And this hair towel is a must to decrease drying time.) I apply about 3/4 a dropper right at the roots, especially. And I make sure to focus near the front where I have some postpartum hair loss.
3. LEAVE IN CONDITIONER
I have been using leave in conditioner for a few months because my hair has been really dry. My current favorite is the In Common Magic Myst Universal Hair Elixir. I spray this on wet hair and then follow with volume foam.
4. VOLUME FOAM
Next, I use the Eleven Australia I Want Body Volume Foam. I love this because it gives me great lift and volume without any crunchy feeling. I apply this only at my roots. It also smells so, so good.
5. STYLING CREAM
Before I blow dry, I apply a small amount of this Colleen Rothschild Protect & Perfect Styling Cream. this Colleen Rothschild Shine Serum just to bottom half of my hair. It helps nourish and protect my hair from the heat and humidity, while also taming flyaways.
6. BLOW DRY AND STYLE
After using the Dyson hair dryer for years, I tried the T3 Featherweight Style Max and was SHOCKED to realize how much I liked the T3 better. It’s lighter, just as fast, and I feel like it gives me more control. It’s also much more affordable (especially if you use the code TERILYN20 for 20% off).
If I’m leaving my hair straight, I don’t use a flat iron. (I don’t even own one.) My hair dries straight with a blow dryer, so that’s all I use, along with this round brush. If I’m curling my hair, I use the T3 Curling Iron or my Dyson Airwrap, depending on what type of look I want.
I shared a step my step tutorial of how I curl my hair with the T3 curling iron here, and how I use my Airwrap here.
To hold my hair up while I blow dry or curl each layer, I use these Alligator Clips.
6. TEXTURE SPRAY + SHINE SERUM
After I’ve dried and styled my hair, I use this ELEVEN AUSTRALIA I Want Body Texture Spray. I flip my head over and spray the roots, and then I’ll also spray the ends of my hair for a little extra texture and finish.
Then, I apply this Colleen Rothschild serum on my ends one more time for extra shine and to get rid of any frizz.
Weekly Hair Treatments
Eleven I Want Clean Hair Dry Shampoo – I’m pretty picky when it comes to dry shampoo and I’ve been really pleased with this.
Eleven Keep My Colour Blonde Shampoo – I use this purple shampoo once a week to keep my color bright and fresh.
Goop Sea Salt Scalp Scrub – I use this scalp scrub once a week to help get any leftover product buildup out of my hair. It smells great and makes my hair feel so clean. If you use dry shampoo during the week, you definitely want to scrub your scalp at least once a week to get it clean. (I hate dry shampoo but if I have to use it, this is the dry shampoo I use.)
Colleen Rothschild Quench & Shine Hair Mask – I was blown away by how different my hair looked and felt the first time I used this. It’s so hydrating but never makes my hair heavy or greasy. I use this once a week.
Let me know if you have any questions in the comments!
Shop My Hair Care
The post My Hair Care Routine + Favorite Products appeared first on TeriLyn Adams.
]]>The post How I curl my hair! (with a video tutorial!) appeared first on TeriLyn Adams.
]]>The vast majority of days I curl my hair, rather than leaving it straight or smoothing it out with a straightener. I feel more polished and my hair is more comfortable during the day with some curl to it since it stays out my face more easily! Another benefit of taking a few minutes to curl it is that it looks cuter if I pull it back in a pony tail during the day, and if I lift weights, I can just do a low bun and it still looks fine post-workout or even on day two. (But if I do cardio, I have to wash my hair – I get too sweaty!)
I’ve attempted to curl my hair with a flat iron and it’s just a total disaster. But I find it super easy to use a curling iron, so I usually stick with that method (or I use my Dyson AirWrap). Plus, it gives a more polished look vs. beachy waves, which I generally prefer. After all, we all want Victoria Secret Angel curls, right? Here’s my review of my curling iron and a quick Instagram Reel tutorial!
The best place to order your T3 curling iron is directly from T3 because I have a promo code (TERILYN20 for 20% off), but they do go out of stock sometimes. Amazon also sells T3! I have a full review of the T3 curling irons linked here.
Here is a quick video showing you how and there are more detailed tips below!
How to Curl Your Hair in 10 Minutes
How To Curl Short Hair With Curling Iron
I use the same method no matter how long my hair is – the only thing that changes is the size of the curling iron.
For longer hair, I use a 1.25″ barrel. For shoulder length or shorter, I use a 1″ barrel. Barrel size really makes a difference with each hair type! Read this post for my T3 curling iron review if you’re considering.
Hair Curling Products
In the video, I show a few products I use to prep my hair, and I also linked them below. Some of the hair products that I use have changed since I filmed the first video when my hair is shorter so the below list is the most current.
Colleen Rothschild Shampoo/Conditioner
I use a tiny amount (dime sized for shampoo, nickel sized for conditioner) so my hair isn’t weighed down with too much product. I love the Colleen Rothschild shampoo and conditioner. The ingredients are pretty clean and my hair looks SO healthy. I have another blog post about what ingredients to avoid in your shampoo.
Colleen Rothschild Hair Mask
I use this Colleen Rothschild Hair Mask once a week and it’s SO hydrating. It gives my hair shine and volume, without weighing it down. It contains a blend of Kokum, Shea Butter, Capuacu and Bacuri Butters, which all help nourish your hair.
If you have super dry hair, you could also try a hair oil a few times a week. This OUAI hair oil contains coconut oil and is SUPER hydrating.
Divi Scalp Serum
I use a dropper of this after washing my hair and massage it into my scalp. I let it absorb before I add anything else. It helps a LOT with postpartum hair loss.
Eleven I Want Body Foam
Next, I use the ELEVEN I Want Body Foam on wet hair. It gives me great lift and volume, but no crunchy feeling. I like the smell a lot, and I’m pretty sensitive to scents, so that’s saying something. I use 3-4 pumps of this only at my roots.
Collen Rothschild Shine Serum
Right before I dry my hair, I use the Colleen Rothschild Shine Serum on the bottom half of my hair. It helps nourish and protect my hair from the heat, while also making sure it stays smooth and shiny. I will use a little bit of this on the ends of my hair once it’s all finished too, to keep everything shiny and smooth. This is currently sold out, but should be back soon.
Eleven I Want Body Texture Spray
Once I’ve dried and curled my hair, I use the Eleven I Want Body Texture Spray. I spray this at the roots, and usually spray with my head flipped over. I might also spray the ends for extra texture too.
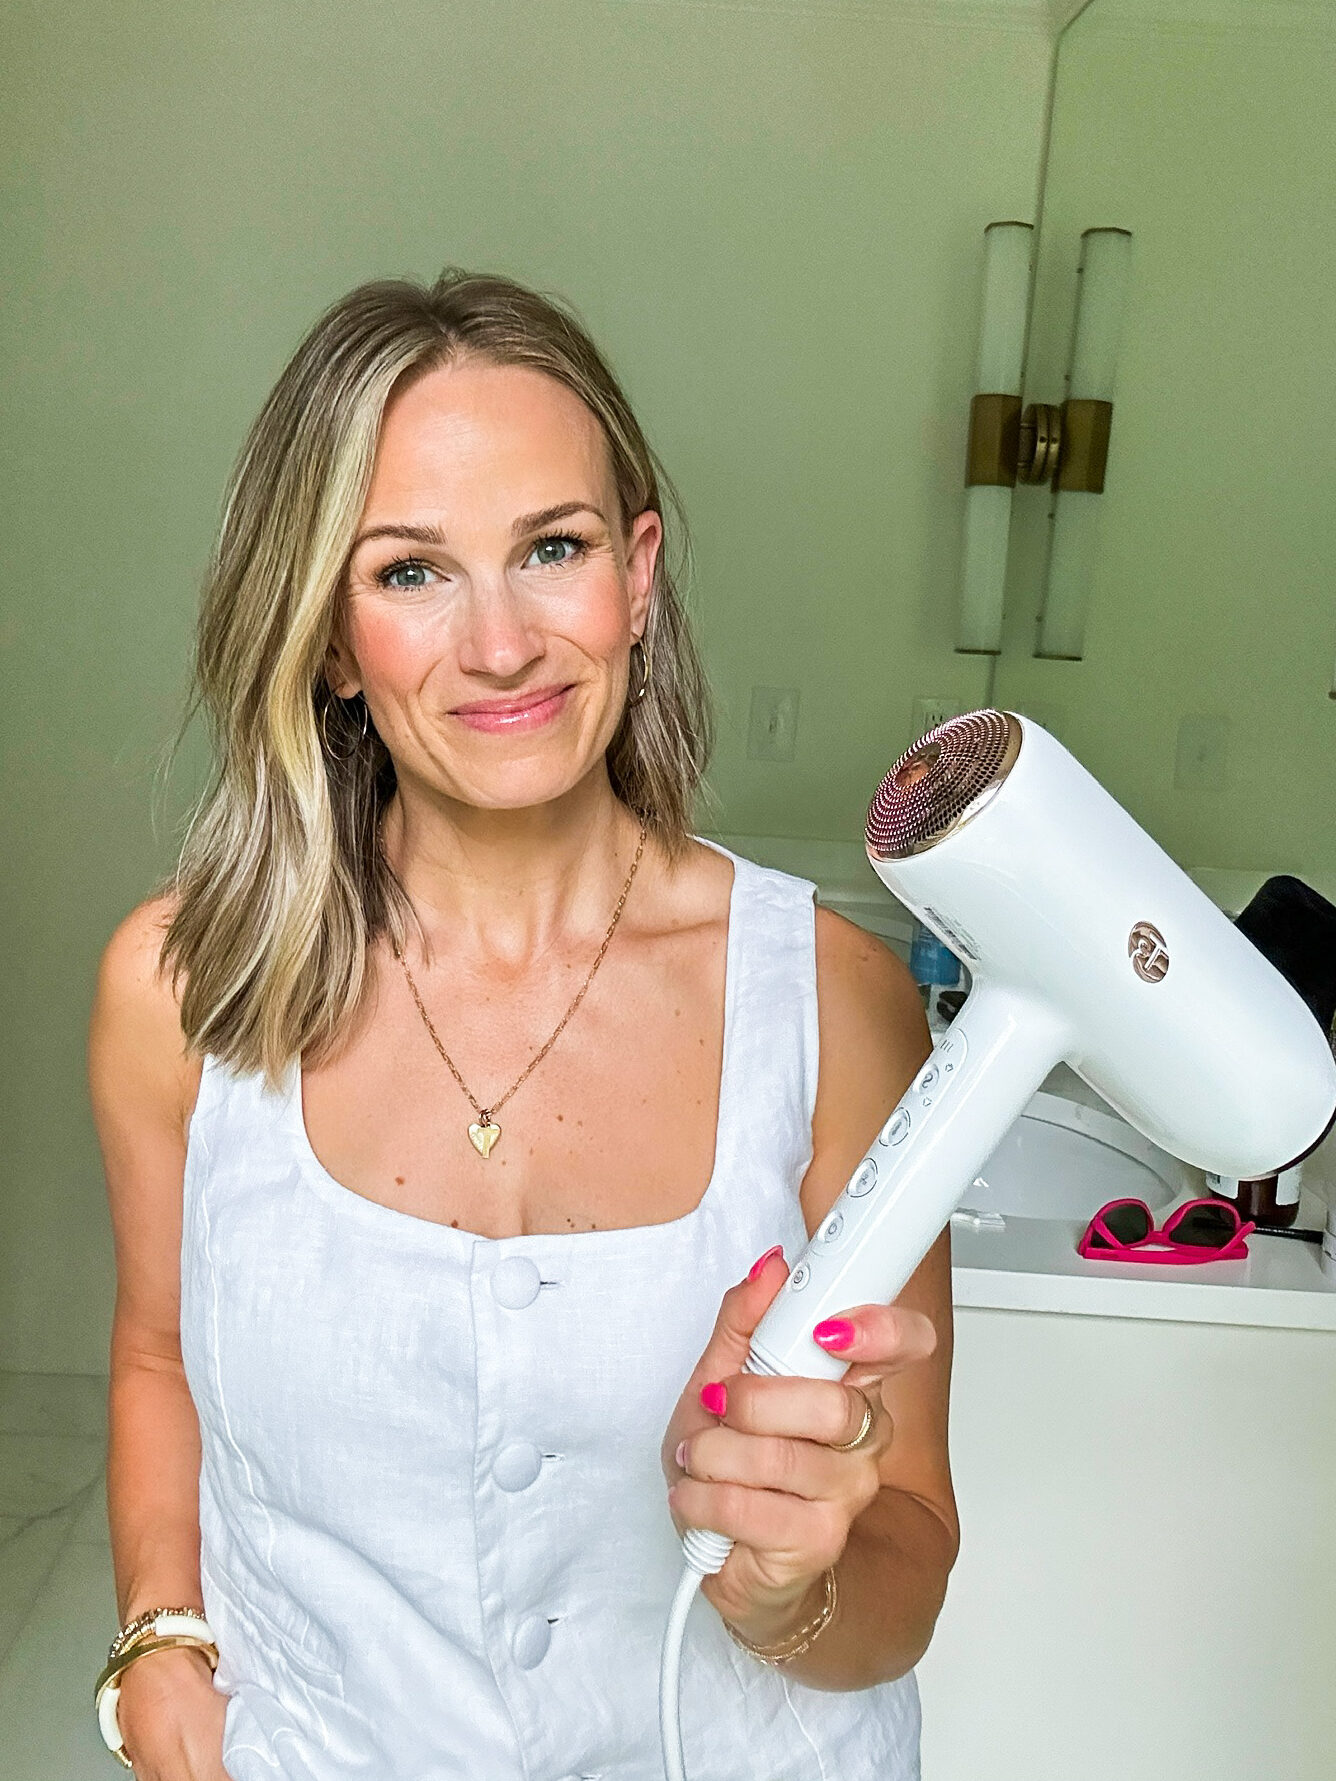
- Blowdryer
- I tried the T3 Featherweight Style Max after using my Dyson Hair Dryer for a couple of years and was SHOCKED to realize how much I liked the T3 better. It’s lighter, just as fast, and I feel like it gives me more control. I shared more about my T3 vs. Dyson comparison in this reel.
- T3 Curling iron
- I upgraded to the T3 one after the spring broke on my Hot Tools curling iron. I LOVE it and it holds my curls longer. And I also like the heat settings, and I feel like I’m protecting my hair better. I do not use a curling wand because I like the clamp! If you use a wand, wrap your hair but not at the ends. If you want tighter curls, wrap small sections of hair in each section. I typically do larger sections for looser curls. I’ve found that this curling iron helps me set the curl much better.
- Alligator clips
- I’ve since ordered these since filming to help pin up my hair as I do the layers and they’re great. I don’t need these as much when my hair is shorter but depending on my hair length, clipping it up is super helpful! When my hair starts getting super long, these are SO necessary.
Easy Hair Curling Tips
Tip #1
I prefer curled hair with loose ends and curls not too close to the root, which is why I clasp it with the curling iron barrel near the root and never curl from the bottom. There are lots of methods for curling hair, but this is my tried and trusted method.
You’ll notice how the ends of my hair stick out just a little after I wrap my hair around the barrel. That gives it a little more natural look by not tucking the ends into the iron.
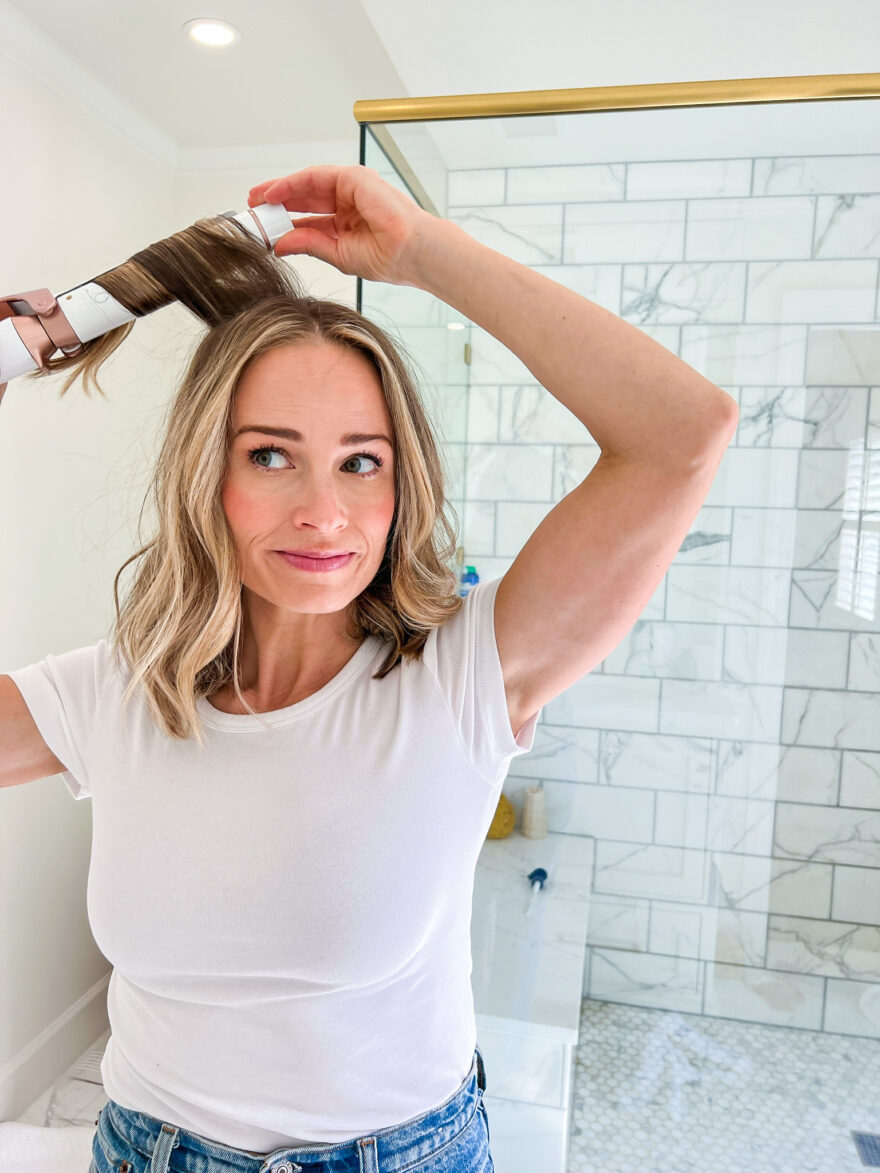
Tip #2
Always twist your wrist to turn the barrel away from your face so it curls away, which helps open up the hair for a fresher look. When you’re curling the back, curl a few pieces in the alternate direction so they don’t all clump together.
Tip #3
I grab somewhat large sections of hair to make it go quickly and so it’s not overly curled (the more hair you use, the closer you’ll get to loose beach waves, and if you use smaller section, you’ll get more defined curls). Then, I go back and get pieces that are too straight and curl them separately. That also helps keep it natural-looking so all the curls aren’t exactly the same size and/or perfectly curled. I prefer looser curls, so that’s why I use large sections of hair.
Tip #4
After I curl, I let the curls sit for a few minutes to cool (usually I do my makeup at this point). Leave your hair alone while the curls are still warm – letting them cool while more tightly curled helps them hold longer. This helps make them bouncy curls.
Tip #5
I don’t brush it out. When I apply texturizer, I use my fingers at that point to break up the curls a bit. If you’re left with tight curls and want to loosen them, use a wide tooth comb to run through your hair. Over time, you should also see the curls fall a tad. I don’t add anything usually (no bobby pins or clips), I just let it fall naturally.
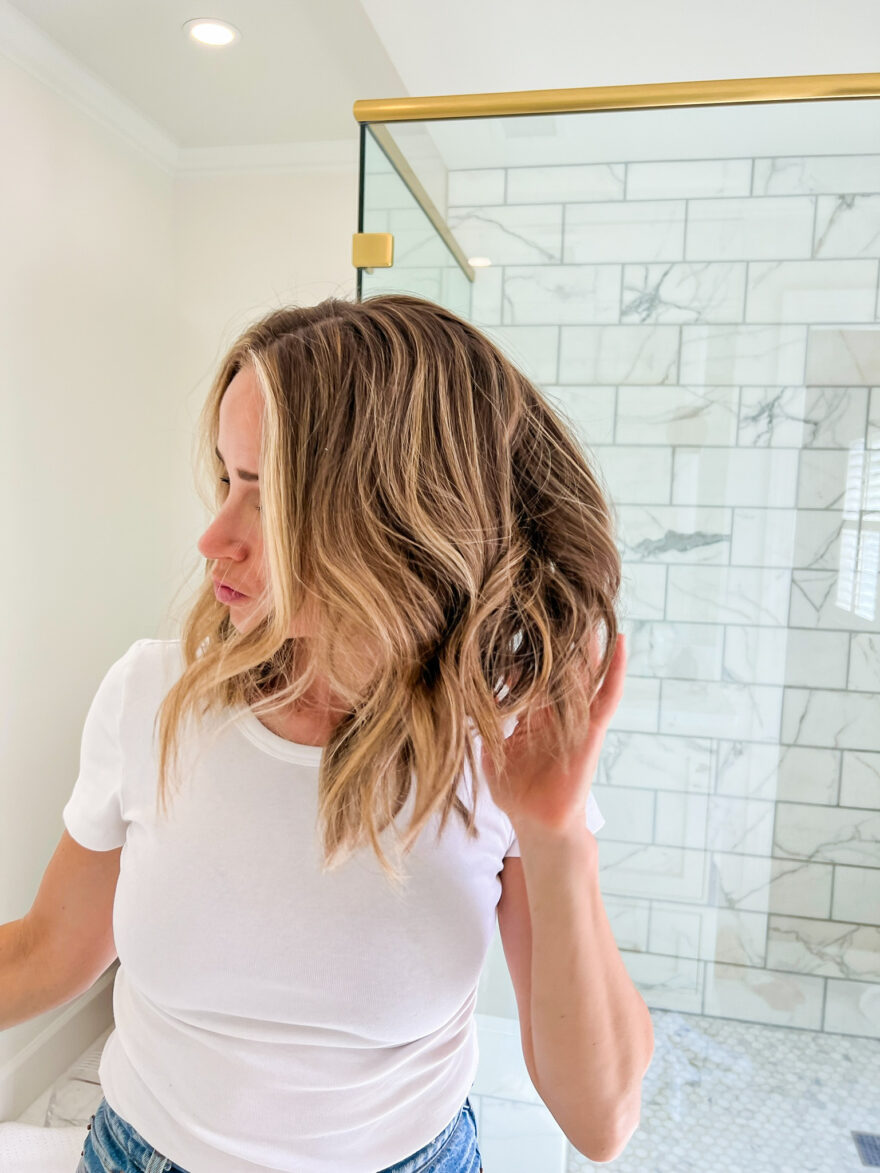
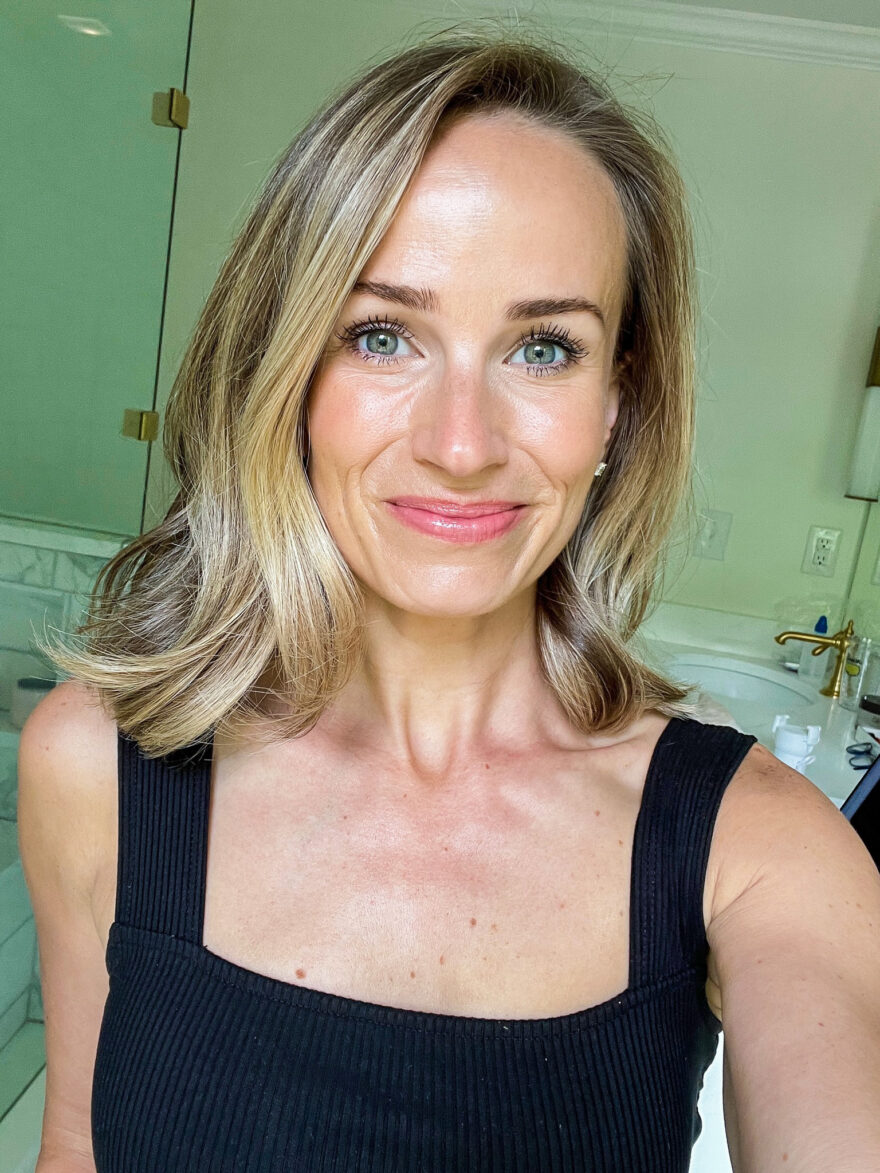
Here are a few pics of how it looks finished!
I usually opt for simple, everyday gold jewelry when I curl my hair and wear it down so that my earrings and hair don’t compete with each-other. See my favorite everyday jewelry here!

Shop the Post
The post How I curl my hair! (with a video tutorial!) appeared first on TeriLyn Adams.
]]>The post My Dyson Blow Dryer Review (Is it worth it + Pros & Cons) appeared first on TeriLyn Adams.
]]>Is the Dyson hair dryer worth the hype? The short answer: No. You should buy the T3 hair dryer instead, which I review in detail here. But if you want more details about the Dyson blow dryer, read on.
Before I give you a full review of the ever-so-famous Dyson Blow Dryer, let it be known that I had never purchased such an expensive hair tool in my life before this. I used my old hair dryer until it was on it’s very last leg, and honestly, it worked just fine. I didn’t have many complaints. But as the skincare and beauty junkie I am, I was very curious about the $400 Dyson hairdryer I kept seeing online.
So when my trusty old hair dryer finally kicked the bucket, I decided to go for it. I ordered my Dyson Hair dryer from Nordstrom because I knew if I hated it, they’d let me return it (best return policy ever).
Dyson has been around since 1993 making vacuums we know and love, but they didn’t start getting into hair tools until 2012. And since they are a market leader in the world of air-flow (yes, that is a thing), when they did start making hair tools, people freaked out. I was SO excited to see if the Dyson hair dryer was worth the hype. Let’s get into the review.

Dyson Blow Dryer Review
The Dyson Supersonic Hair Dryer makes some serious claims. It’s engineered to protect hair from extreme heat damage, with fast drying and controlled styling to help increase smoothness by 75%, increase shine by up to 132% and decrease frizz and flyaways by up to 61%.
It uses patented Air Multiplier technology, which produces a controlled, high-velocity jet of air for SUPER fast drying. It’s the same powerful feeling as the Dyson hand dryers in some restrooms.
This hair dryer measures airflow temperature over 40 times to prevent extreme heat damage and it’s engineered for all hair types.
I will say because the Dyson is so powerful, it takes some time to get used to. I like that the nozzle comes off, so this hair dryer doesn’t take up much space, which is great for packing. My only qualm is how bulky the cord is. If you have a vanity, I’d keep your Dyson plugged in and tucked away since pulling out the bulky cord each time is annoying.
So, if you want a hair dryer to dry your hair as fast as possible and/or if you struggle with heat damage and/or frizz, it’s a great option, but it’s not necessarily the best or only option.
The cord and power brick are annoying enough that I eventually bought the T3 Featherweight StyleMax Hair Dryer instead and like it a lot better, so that’s the one you should buy instead.
Dyson Blow Dryer Attachments
The Supersonic Hair Dryer has five magnetic attachments. Some sets come with them but not all (mine didn’t!). Since they’re magnetic, the attachments can spin 360 degrees, which is nice when you need to angle the attachment differently for different sides of your head.
1. Flyaway attachment
This attachment is for taming flyaways in one pass. If you struggle with frizz, this is for you. From the videos, this indeed does hide flyaways–it’s wild to watch.
2. Styling Concentrator
This is similar to a traditional hair dryer nozzle that allows you to dry your hair in sections with controlled airflow. This attachment is ideal for blowouts with a round brush.
3. Diffuser
This attachment disperses air evenly to simulate natural drying, helping to reduce frizz. The longer prongs allow you to style more hair with greater control – and reach deeper into the hair. If you have super curly hair, this will be great for you!
4. Gentle Air attachment
The gentle air attachment diffuses the air, creating a gentle, cooler airflow. If you have very fine, thin hair, you’ll like this attachment for extra control and to help prevent heat damage (this is the closest option to letting it air dry).
5. Wide-tooth Comb
Helps shape and lengthen curly and textured hair as it dries.
Features And Settings
- Intelligent heat control – Measures airflow temperature over 40 times per second (!!!) to prevent heat damage to your hair.
- Dyson digital motor V9 – Spins up to 110,000 rpm, propelling 13 liters of air up to the amplifier every second, which is how it’s such a powerful hair dryer.
- Air Multiplier technology amplifies the airflow to produce a controlled, high-velocity jet of air for fast drying.
- 3 precise speed settings – this gives you more control as you style.
- 4 precise heat settings – From 212 to 82 degrees.
- Cold shot option – this helps set your style!
Pros
- Dries hair very quickly – this is the #1 reason I love it. I hate drying my hair, so anything to speed it up is a huge pro in my book.
- Less static – Many hair driers use negative ions to add moisture back into the hair, which reduces static, but Dyson learned that to retain the moisture in your hair that helps reduce that pesky static, you really need a hair dryer that stops over-drying your hair from the get-go.
- Less frizzy and less damaged – My hair does feel smoother when I use this dryer vs. when I use other hair dryers while traveling. I hate cheaper dryers so much that I finally got a travel blowdryer, so I can always have a good one with me (my T3 travel hair dryer is honestly incredible; I’d say it dries my hair about as 90% as fast as the Dyson).
- Slimmer profile makes it easier to store, since it takes up less space than hair dryers with a longer air barrel
Cons
- It’s very heavy.
- The cord is thick and hard to store.
- The power brick on the cord is super annoying and rams into my vanity, which I hate.
- It’s expensive.
Bottom line: Is the Dyson hair dryer worth it?
No. At first, I thought it was the best hair dryer ever but I much prefer my T3 hair dryer now, which I also reviewed.

How to Use the Dyson Blow Dryer
I always start with clean hair. I’ll also share the products I use every time I dry my hair since I do think they make a difference!
1. Wash
I use the Colleen Rothschild shampoo and conditioner daily. They don’t weigh my hair down, but they leave it super hydrated and smooth.
2. Scalp Serum
I use Divi Scalp Serum on my hair once it’s towel dried. I apply about 3/4 a dropper right at the roots. And I make sure to focus near the front where I have some postpartum hair loss. I’ve been using this for about 4 months and am blown away by the new hair growth I have (I lost so much hair after having Thomas and then getting sick with the big C-word twice).
3. Volume Foam
Next, I use the ELEVEN I Want Body Foam on wet hair. I love this because it gives me great lift and volume without any crunchy feeling. It also smells amazing. I use 2-3 pumps and apply it only at my roots.
4. Shine Serum
Before I blow dry, I apply a small amount of this Colleen Rothschild Shine Serum just to the bottom half of my hair. It helps nourish and protect my hair from the heat, while also making sure it stays smooth and shiny.
5. Blow Dry and Style
Now I use the Dyson. First, I give my wet hair a rough blow dry to knock the water out of it. This typically takes 2-3 minutes for my thick hair. I flip my head over and dry my hair upside down to add extra volume, and at this stage I use my fingers rather than a brush to run through my hair as I’m drying it.
When my hair is damp (not soaking wet), I section my hair off. Starting with the bottom layer, I use the styling concentrator nozzle and a round brush. Using the round brush underneath the layer, I point the Dyson straight downward onto the section over my brush while rolling the brush down my hair. This takes some practice, but once you get the hang of it, you can style your hair easily at home without needing to hit the salon for blowouts.
I use this same technique until I get to the last layer, which is my bangs. For my bangs, I pull my hair with a brush to the opposite direction of how it lays, dry that way, and then flip my hair back over for more volume. Then I use my round brush and roll my hair on it towards the back of my head, drying the section above my forehead.
To hold my hair up while I work on each layer, I use these Alligator Clips.
6. Texture Spray and Shine Serum
After I’ve dried and styled my hair, I use this ELEVEN AUSTRALIA Dry Finish Texture Spray. I flip my head over and spray the roots, and then I’ll also spray the ends of my hair for a little extra texture and finish.
Then, I apply this Colleen Rothschild serum on my ends one more time for extra shine and to get rid of any frizz.
7. Finishing Spray
If I need my hair to last all day, I LOVE the Kenra Dry Oil Control Spray. It’s lightweight and gives great hold without making hair crunchy. It also smells amazing but isn’t so strong that it bothers me. I’m pretty sensitive to scents and I currently have two hairsprays in my drawer that I can’t use because of the smell (I need to just give them away!).
Like I mentioned above, I got my Dyson at Nordstrom, but you can also find it at these retailers:
You can often find a refurbished one from Dyson.com. That’s how I got a great deal on my Dyson Airwrap – and you can read my review of that here.
I’ve been so happy with mine, and I hope this post helps you make an informed decision too!
Shop the Post
The post My Dyson Blow Dryer Review (Is it worth it + Pros & Cons) appeared first on TeriLyn Adams.
]]>The post Dyson Airwrap Tutorial (how to use on short hair) appeared first on TeriLyn Adams.
]]>Needless to say, when it finally arrived, I was thrilled to try it out. So today I’m going to share how I use it for short hair, and why I LOVE it. I’ll get into more details below! There’s also video below to show you how I use it, as well as this Airwrap reel so you can see the tutorial in action!


Dyson Airwrap — How to Use on Short Hair
Before using the Dyson Airwrap, I always wash my hair. Starting with wet, clean hair has given me the best results.
1. Wash
My favorite shampoo and conditioner is by Beautycounter. I’ve used it for years and while it’s nothing fancy, it works well and it’s clean. And if I’m not using the Beautycounter products, I’m likely using Colleen Rothschild shampoo and conditioner, which are my other favorites.
2. Divi Scalp Serum
I use Divi Scalp Serum on my hair once it’s towel dried. I apply about 3/4 a dropper right at the roots, especially. And I make sure to focus near the front where I have some postpartum hair loss. I’ve been using this for about 4 months and am blown away by the new hair growth I have!
3. Volume Foam
I use the ELEVEN I Want Body Foam on wet hair. It gives me great lift and volume without any crunchy feeling. It also smells amazing. I use 2-3 pumps and apply it only at my roots.
4. Shine Serum
Then before I use the blowdrying attachment, I use a small amount of this Colleen Rothschild Shine Serum just to bottom half of my hair. It helps nourish and protect my hair from the heat, while also making sure it stays smooth and shiny.
5. Rough blow dry with the pre-styling dryer attachment
Now I start with the Airwrap. I use the pre-styling dryer attachment on my wet hair until it’s about 80% dry. If you try to use the other styling tools on dry hair, they won’t work super well.
I also have the Dyson supersonic hairdryer, but I use that when I’m not pulling out the airwrap, since the airwrap also has a blow dryer attachment.
5. Blow out each section with volumizing round brush attachment
Once my hair is about 80% dry, I switch to the volumizing round brush attachment and dry my hair layer by layer. I use the pre-styling dryer attachment on the highest heat setting but I switch the heat to medium with the round volumizing brush since it gets VERY hot.
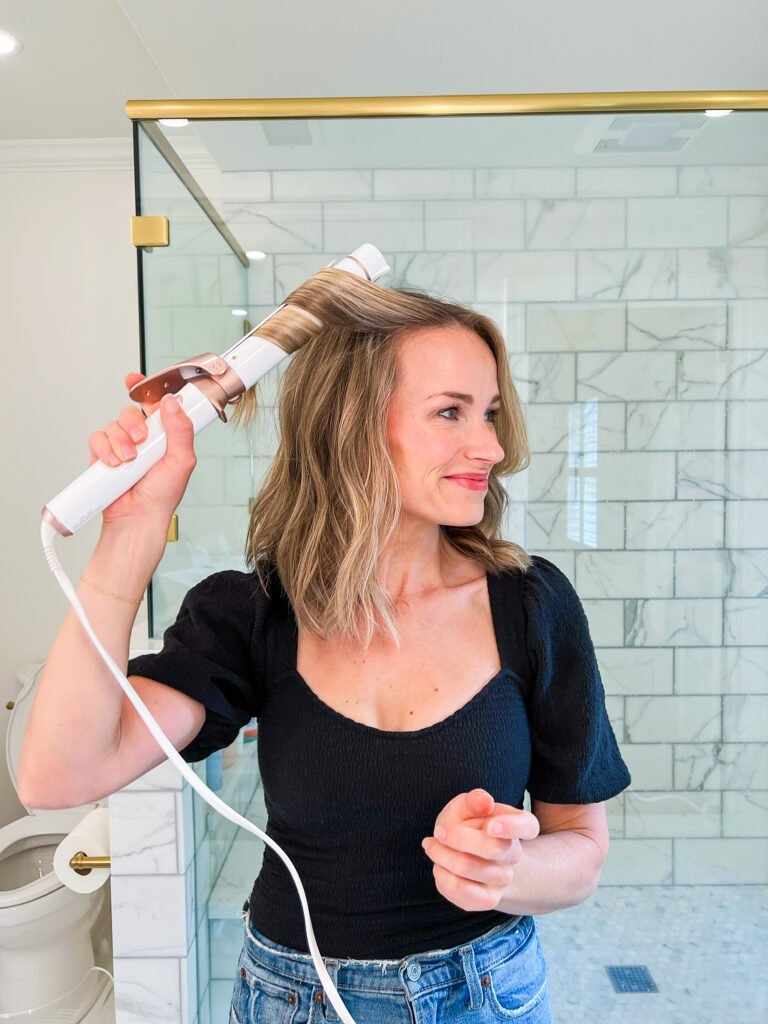
I haven’t perfected wrapping my hair around the brush so I just pull it straight up, away from the roots to create volume. Using my hand, I gently press my hair against the brush to create a little bend in it from root to tip. I do this the same way I would use a traditional round brush and hair dryer, pulling my hair away from my head at the roots and working it into a slight curl at the ends. And I just don’t wrap it all the way around the brush. I can accomplish that on the left side of my head but not my right so I guess it takes coordination I don’t have yet!  I go over each layer multiple times until the section is smooth.
If I’m in a hurry, I don’t bother pinning up layer by layer. I just rough dry and then use the brush to smooth it and bend it under a bit. But doing it one layer at a time, definitely helps it look more polished, more curled and gives it more volume.
6. Blow out the top layer and my bangs
When I let the top layer out of the clip, I part it down the middle. Then, I start at the back and pull those strands straight up and under, with slight tension towards the front of my head. Then, I take the next section forward, picking up pieces on each side of my part and blow those straight up and curling towards the back. I may have to do this 1-2 times to get all the pieces dry.
I leave my bangs for the end of the blow out. Then I start with the shorter section of my bangs and use the volumizing round brush attachment to pull my bangs up and then directly forward, over my face. Then, I take the next layer beyond my bangs and bring those forward too. By this point, I’ve taken two sections back and two sections forwards.
I don’t do the top pieces directly out to the side since pulling the hair in a different direction that it typically fals helps create volume when it falls back into place. Then, when I flip it over for a side part (which I prefer when styled this way), there is extra volume and movement.
7. Add curl with the barrel attachments
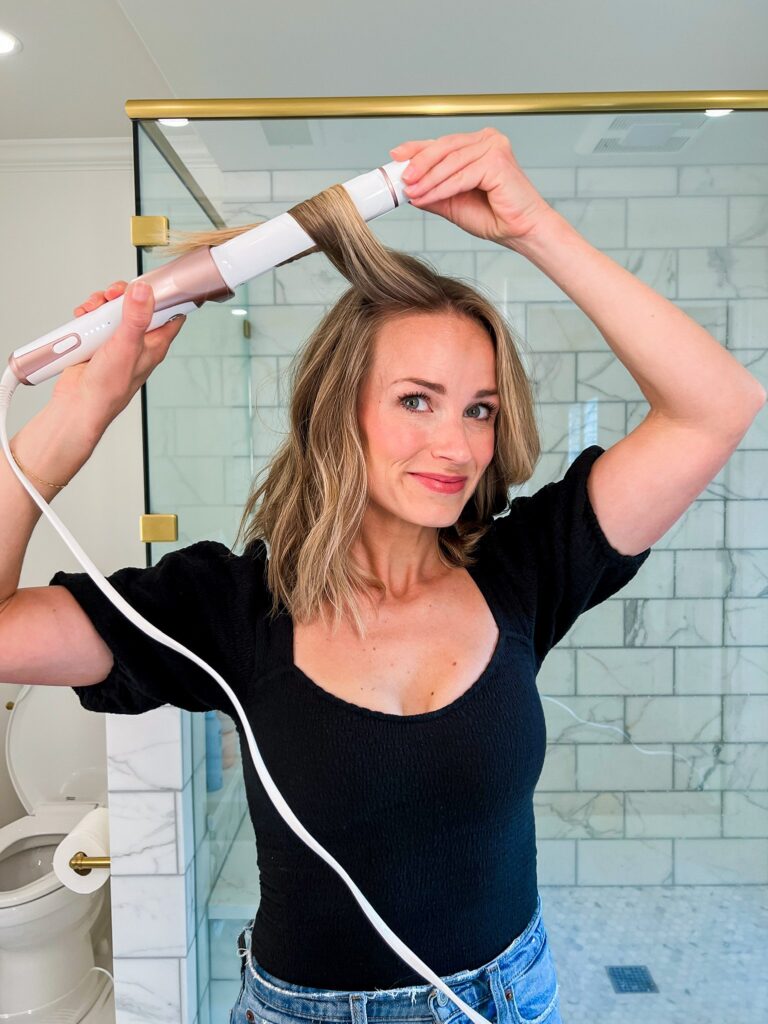
If I want to add extra curl, then I use the barrel attachments. I’ve learned that I need both the small and larger attachment for short hair, since it’s too short to really go around the big barrel. Then I use the big barrel for the top half for more volume. It takes a few attempts to figure out the barrel attachments, but the most helpful tip I’ve found is to let the barrel pull your section of hair into the barrel from the ends of your hair first (different than how I use a regular curling iron).
8. Touch up
After I’ve dried and styled my hair, I use this ELEVEN AUSTRALIA I Want Body Texture Spray. I flip my head over and spray the roots, and then I’ll also spray the ends of my hair for a little extra texture and finish.
Then, I apply this Colleen Rothschild serum on my ends one more time for extra shine and to get rid of any frizz.

My Honest Review
I truly LOVE the Dyson Airwrap. While it’s very pricey and hard to find in stock, it’s well worth it if you can get your hands on one. I specifically love how easy it is for me to create a salon-style blowout at home, anytime I want. Another thing I love about the Dyson Airwrap is that it’s powerful enough to dry my hair fully without using extreme heat.
I also really like the smoothing attachment (the new version comes with two smoothing brushes, a soft smoothing brush, and a firm smoothing brush) if I’m really in a hurry since that seems to be the fastest for me but I prefer the volume of the round brush. And I like the AirWrap barrels, but I’m not very patient using them and I’m so much faster using a curling iron. But, when I DO take the time I love the volume that those wands give me. The trick is to do a cold shot on your hair before letting your curl go from the barrel. While it is a challenge to learn how to use the Airwrap at first, with practice it becomes more effortless. The best part about the AirWrap is that you can get a ton of different hairstyles with one tool.
I got my refurbished directly from Dyson, but you can also find it at Sephora, Ulta, and Bluemercury when it’s in stock. You can also buy display stands for your Dyson airwrap styler if you prefer that over leaving it under the counter in the box it comes with (I like the box just fine).
Do you own the Airwrap or have it on your wishlist? If so, let me know in the comments below! And let me know if you have questions!
Shop the Post
The post Dyson Airwrap Tutorial (how to use on short hair) appeared first on TeriLyn Adams.
]]>